Tag: rural

  • Before the Tide Took It Back: Kayaking Moricambe Bay

    Before the Tide Took It Back: Kayaking Moricambe Bay

    Warning sign showing a man sinking in quicksand with text 'WARNING! QUICKSAND! DO NOT ENTER!'

    Disclaimer – the events described in this post have the potential to be extremely dangerous. This trip was undertaken with local knowledge, relevant experience, safety equipment and an informed risk assessment. I recommend that you do not attempt it.

    Sea kayaking into the unmapped corners of Moricambe Bay in search of two first Geographs before the tide closed the window.

    I wrote about Geographing back in November, in Taking the “Y” off Geography – a Morning on the Solway. I’m part of a wholesome community gradually photographing every one-kilometre grid square in Britain and Ireland: a sort of manually assembled Street View for the places Google’s cars cannot reach.

    After twenty years, most of the straightforward squares have been captured. I happen to live near roughly two hundred that have not, and chip away at them when time permits. 

    My last effort involved monitoring the tides and jogging 1.6 miles over the seabed in the general direction of Scotland. I came away with four first Geographs. For my second go, after several months of studying maps and tide tables, I settled on Moricambe Bay.

    The Bay

    I can see the bay from my house. It is a long way off, but I can tell whether the tide is in or out. I often walk my dog to Grune Point, the tip of the spit of land at the top. From there, across the water, you can see Anthorn Radio Station, a Cold War-era defence establishment that literally glows red in the dark.

    Black and white image of Anthorn radio station - transmitters stand out against the white sky.  Viewed from Grune Point at low tide.
    Anthorn Radio Station

    To the right of the transmitters, about 1km out, several vertical timbers stick out of the water, like the remains of a bridge or a pier.

    Wooden structures emerge from the sand - taken at low tide from Grune Point.
    Remains of WW2 bombing target, Moricambe Bay. Viewed from Grune Point.

     There is a WW2 pillbox just back from the shore. You can see across to the Dumfries coast. It is a liminal place. It looks different every time I see it. I enjoy the exotic flotsam. There is a blurred transition from farmland to seabed. Every time I visit, I study the tide tables and watch the flow and direction of the currents. They are fierce: the tidal range here is up to 10.6 metres, funnelled into a narrow bay. There are no Admiralty charts this far up. It is not supposed to be navigable.

    WW2 pillbox made by stacking sacks of concrete on top of each other.  A concrete cone on the top is a memorial to firefighters who drowned in the bay.
    WW2 pillbox – the conical structure on the roof is a memorial to four firefighters who drowned in a rescue attempt in the 1950s
    This object was washed up on the beach, it looks as if it came from The Bulldog, Amsterdam, a famous coffee shop.
    The flotsam and jetsam here never disappoint- has this travelled all the way from Amsterdam? Probably not but it may have come from Scotland.

    The bay itself is fed by two main rivers: the Wampool from the east and the Waver from the south, as well as smaller streams such as Skinburness Creek from the west. It is at least arguable, and I have convinced myself, that the source of a tributary to the Waver is next to our house.

    You can find the bay instantly on any map of the British Isles. Look for the bulge of St Bees Head, follow the coast up towards Scotland, and just before the Solway Firth narrows you will see it on the right, shaped like an asymmetrical droopy moustache.

    Apple Maps screenshot of Moricambe Bay illustrating the distinctive "droopy moustache" shape
    Screenshot from Apple Maps ©️

    When the tide is out, the river channels and mud make it all but impossible to explore on foot. The bay contains twelve 1km grid squares, five of which had yet to receive a first Geograph.

    Salt marsh farmland leading to the sandy channel of one of the rivers that flows into the bay.  A dishevelled cattle fence stands on the edge.
    The salt marshes are used by grazing cattle, the resulting beef is the stuff of local legend.

    I hatched plans to get into them with my sea kayak. My main objective was NY1755, a plot of marshland to the east of Newton Arlosh, right at the bottom of the bay. I marked up a paper OS map with a few other targets and then it was just a case of waiting for the right combination of weather, tide and free time.

    Author's paper OS map marked up with squares of interest.  The map is within an Aquatic map case and a compass is in the corner.

    Execution

    On Sunday afternoon, my ducks were finally lined up.  My friend and longtime kayaking buddy Nick was staying and we needed a quick local adventure.  

    We set off from Silloth at about 1pm. High tide was due at 2:55pm, and the forecast was Beaufort F2, a gentle breeze from the west. It felt much calmer than that.

    Stony beach in Silloth, the sea a light shade of blue / grey and in the distance Criffel on the horizon - a 570 meter hill in Dumfries and Galloway.
    The sea looked thoroughly pleasant, you can see Criffel on the horizon.
    My yellow Dagger Stratos kayak laying on the yellowing grass next to our car on Silloth sea front.  Nick's P&H Cetas sea kayak is on the grass in front of the car.
    Getting ready to go

    We had to skirt wide around the sand bar that runs north from the start of Grune Point, not quite having to use our knuckles on the sand. Kayaks feel fairly sluggish in shallow water, so we were relieved to enter Moricambe Bay.

    Me in my kayak, Anthorn transmitters in the background
    The author

    Nick in his Kayak, Grune Point in the background.
    Nick

    I should have headed straight for NY1755, but the vertical wooden structures in the middle of the bay caught my eye. I’d been curious about them for a very long time, so I temporarily abandoned plan A and made a beeline for them. As we got closer, we realised there were Great Cormorants nesting on the posts. I counted about sixteen vertical timbers, most with a nest on top. The wood was stained white with guano. 

    Timber structures sticking up out of the grey sea water.  Great Cormorants nesting on top of them.  Yellow kayak in the foreground.
    First Geograph captured – see NY1556

    We changed course a little so as not to disturb them. Although we had not been too aware of the tidal flow until then, the static timber gave us a reference point as we were pulled sideways into the bay at walking pace. There was turbulence in the water around the foot of the posts. I timed it so we would reach them close to high tide, when the flow should have been easing. Definitely not a place to be at peak movement.

    I grabbed a couple of GPS-tagged stills with my tough camera and we headed north.

    As we approached Anthorn, I realised the foreshore to the south was still out of the water.   Someone else had already bagged that square, so we pressed on to another sand bar just south of Cardurnock.  

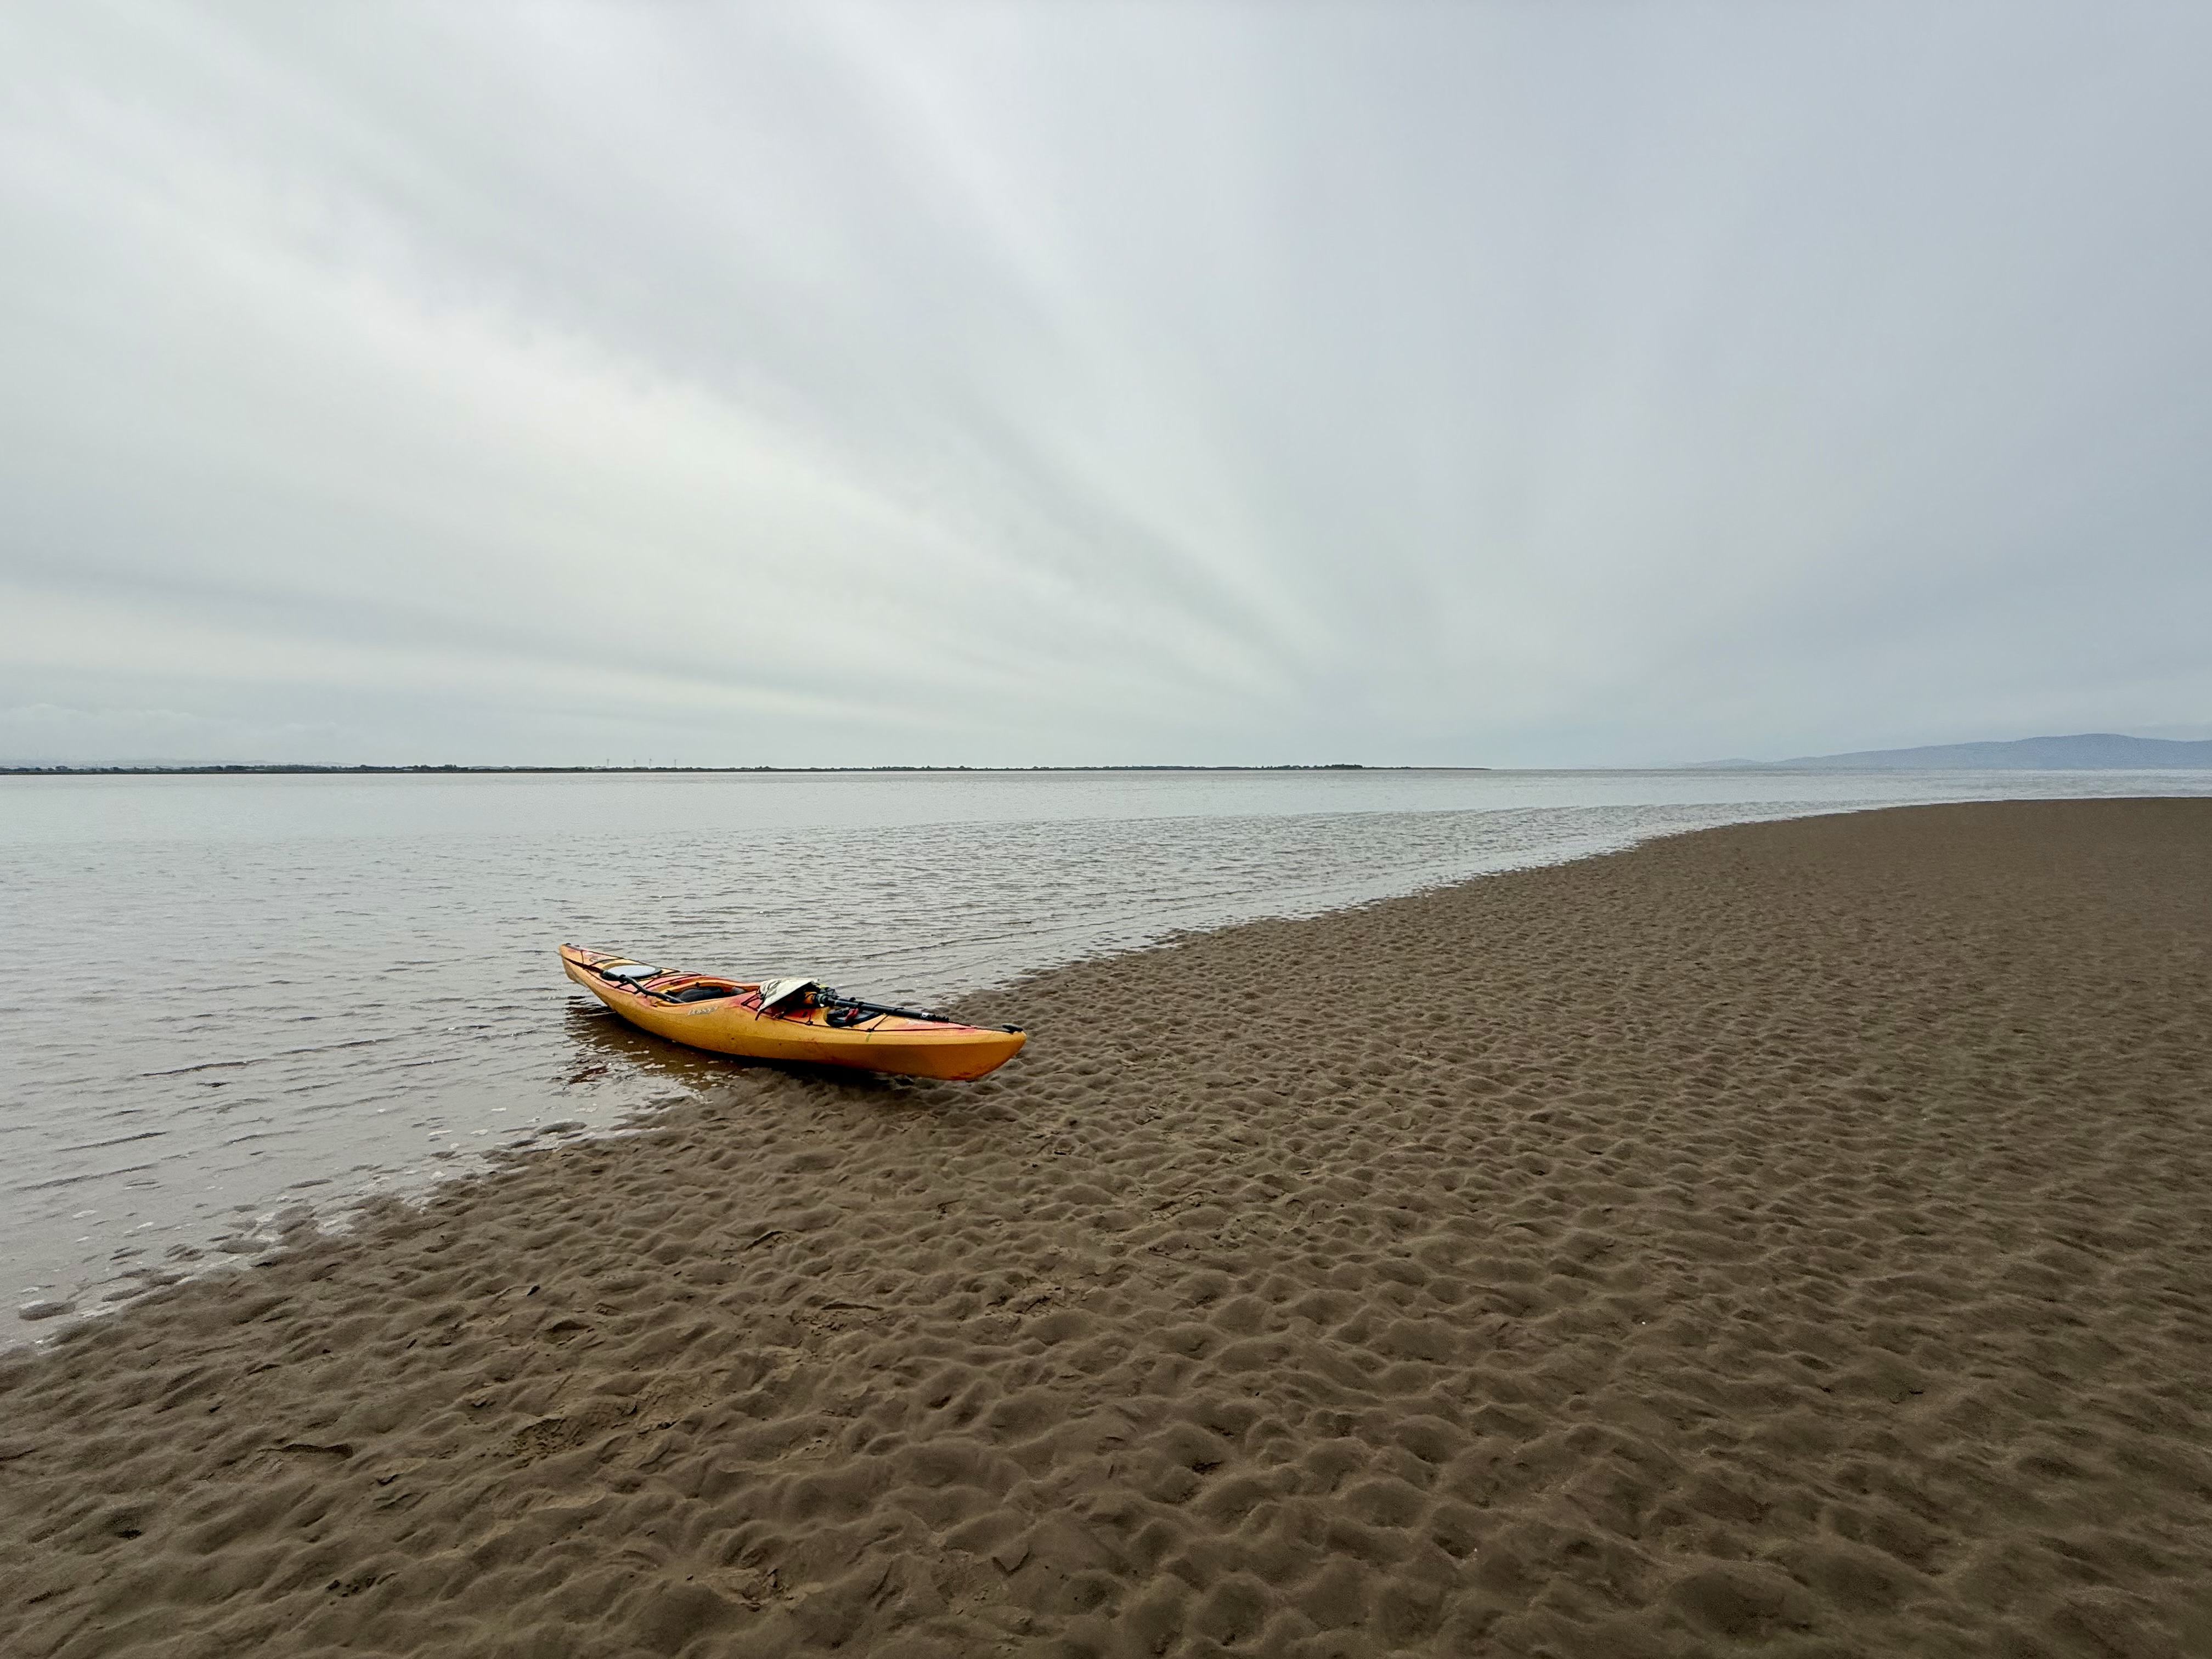
    The sand was the colour of Earl Grey, mostly gritty but with a hint of estuary mud.  It felt solid underfoot.  

    Kayak out of the water (just) sand in the foreground, sea in the the middle distance.

    I checked my mapping app.  I’d already marked all the unclaimed geographs, we were right inside one so I snapped away happily whilst Nick dug some chocolate out for us both.  

    Screenshot of the mapping app used to locate grid squares.

    In the 5 minutes it took me to take the photos, the sea reached and floated my empty kayak. 

    Anthorn transmitters in the distance, sand in the foreground.  Nick and his kayak resting on the edge of the sandy beach to the right.  This was the first geograph captured on this grid square.
    First Geograph for NY1657

    We decided to paddle due south, still hoping to reach our original target. About 1.5km short of it, we ran out of water. From a kayak, sat almost on the surface, wet sand and shallow sea can look much the same. This was not a shallow patch but a substantial sand island. Going round it would have meant another 1.5km or so of paddling, with no guarantee of finding a channel or getting out of the bay afterwards. As it happened, the island itself had never been photographed, so I decided to make the most of it and got out for a walk. It was solid enough, though softer than the previous sandbar.

    Author's empty kayak half on the beach, Nick afloat taking a photo back at me.
    I pulled my kayak out of the water, by the time I got back to it it was well afloat.

    It occurred to me that I might just be able to set foot in NY1755 if I ran to the far side, but I would have to be quick with the tide on its way in. Nick stayed in his kayak, with mine clipped to his by a short tow rope. If I misjudged the rising water, he would be able to paddle over to me.

    Dark coloured wet sand, dirty foamy looking sea with waves breaking on the edge of the sand island.
    First Geograph for NY1756

    Jogging and taking photos as I went, I reached the far end of the island.  I was still 300m short of my target. We were separated by a deep channel.  I was disappointed, but after a very quick spot of mapwork I realised I could still get the unclaimed square to the west, the gridline appeared to be slicing the end off the island I was stood on.  

    At this scale, on such featureless ground it’s almost impossible to determine a grid boundary other than by GPS.  As I reached the invisible line, I realised the sea was just outside of it but coming in fast.  You can’t claim a geograph unless some dry land is visible within the square. I waded out 10m or so into the shallow water and took a photo looking back. It wasn’t very good, but it would have to do for now. 

    First Geograph captured for this square.  Image shows sea in the foreground, a little sand in the middle ground and Anthorn transmitters to the left.
    First Geograph for NY1656

    I was now about 300m or so from Nick and the boats.  I could see they were afloat.  I jogged back over, very excited to have collected two first geographs. These felt like a bigger prize than the one I’d originally set out for – transient offshore sand features that might not exist for the next geographer to try.

    Heading back to the boats which are now both floating, Nick in the cockpit of his P&H, my Dagger tethered to it by a short tow line.
    Very excited to have captured two first Geographs

    I got back into my kayak and we made haste to get out of the bay whilst there was still enough water.     

    The sea had picked up quite a bit whilst we were in the sheltered bay.  It made for quite an enjoyable paddle back to the car.  One hour after high tide we were driving home, mission safely accomplished.  

    I didn’t quite manage to get NY1755 this time, but I’ve proved to myself that it can be done.  Next time I’ll bring a bit more discipline and head straight to it.  

    I must take pains to urge you not to try to explore this bay unless you either really know what you’re doing or are being guided by someone who does. We had the benefit of a good practical grounding in sea kayaking, copious safety gear, a degree in geography, local knowledge and a fair bit of experience managing risk. A lot can and does go wrong on this stretch of coast.

    Resources and further reading

    If you are curious about the equipment used on this trip, take a look at my kit list.

    Anthorn Radio Station – a Cold War era radio transmitter system on a former Royal Navy airstrip.  Still in use now for communicating with our submarines.  

    Anthorn gate street view – you can’t get into this sensitive site.  

    Solway Coast National Landscape – the wildlife, geography and history of the bay.

    Substack blog about Grune Point – a different and excellent take on this location by Angie Dawn.  

    Remains of Grune Point bombing range – an explanation of the wooden structures in the middle of the bay by the Silloth Airfield history team.

    Geograph.org.uk to learn more about this remarkably satisfying hobby.

  • Starlink in Rural Cumbria

    Starlink in Rural Cumbria

    A Real-World Review for UK Remote Workers

    We live over a mile from the nearest fibre connection. Getting workable internet here has been frustrating  and at times impossible, though a price worth paying for living in such an extraordinary place.

    We started with BT copper. Speeds hovered around 1 Mbps on a good day. If the neighbours attempted to go online at the same time as us, it simply fell over.

    We moved to Solway Communications. Initially promising – around 15 Mbps, but after a takeover the service deteriorated to barely better than BT.

    Then we tried 4G. An external aerial occasionally delivered 40 Mbps. The problem was consistency. Weather and network demand ruled everything. It would fail at exactly the moment guests arrived and we tried to stream a film.

    Back in 2012, patchy internet was inconvenient.

    In 2026, it sits somewhere alongside water and electricity.

    I work from home. Video calls must not drop. Files must upload. We stream all television. The air source heat pump follows its schedule via Wi-Fi. The Ring doorbell depends on it.

    Reliable internet is no longer optional.

    If fibre ever reaches us, I would reassess. Until then, we needed something that simply worked.

    youtube placeholder image

    Installation

    In December 2024, we took the plunge.

    I arrived home at around 7pm to a large box and, like a child at Christmas, installed it immediately, by torchlight.

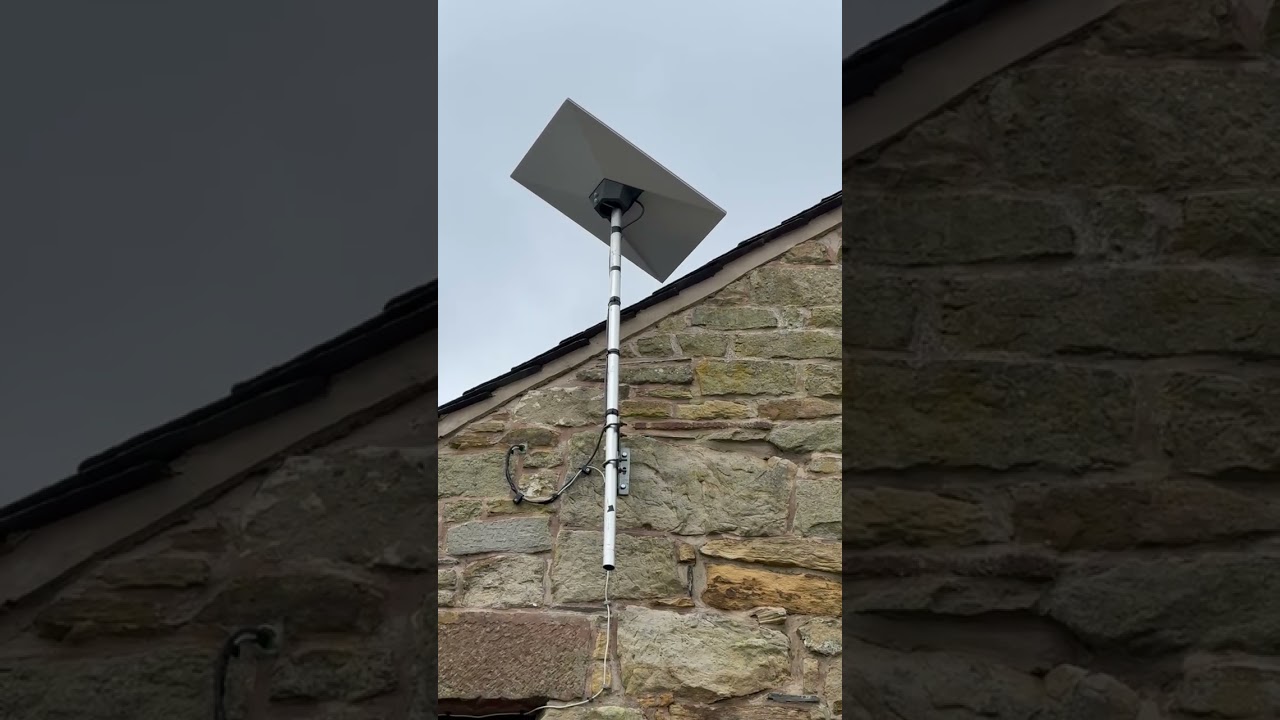
    The dish now sits high on the gable end, mounted on a pole. The cable runs through existing conduit into the bedroom.

    Setup is straightforward:

    • Download the Starlink app

    • Connect to the router

    • Use the in-app alignment tool to optimise positioning

    Screenshot from my starling app showing the obstructions tool - in here there is clear view of the sky in all directions.

    It requires an unobstructed view of the sky. Ours faces roughly south. If you’re concerned about obstructions, you can download the app in advance and use its sky-scanning tool from your proposed mounting point.

    The dish sits almost horizontal and includes a built-in heater that activates automatically to melt snow — a detail that matters in the UK.

    It is, essentially, install-and-forget technology.

    Performance

    Reliability has been exceptional.

    Unlike my old EE 4G setup  which required constant rebooting and adjustment, Starlink has simply stayed up. Uptime feels around 99.9%.

    Download speeds:

    Screenshot from my speed test app - 191.5 Mbps download and 24.2 Mbps  upload ping 19ms jitter 2.7ms data 246mb

    • Typically 100–250 Mbps

    • Occasionally up to 300 Mbps

    • Rarely below 50 Mbps

    Upload speeds:

    • Usually 10–25 Mbps

    We routinely run two 4K streams while I’m on a video call, with no noticeable degradation.

    Speeds vary slightly with weather and demand, but nowhere near as dramatically as 4G did.

    Automatic software updates occur occasionally around 3am, briefly disconnecting the service.

    For remote professional work in rural Cumbria, it has been completely dependable.

    Power Consumption

    In normal operation, our dish draws roughly 30–40 watts.

    During snow melt, it draws more temporarily.

    For comparison:

    • Typical fibre ONT + router: ~10–20W combined

    • 4G router setup: ~10–25W

    • Starlink: roughly double typical fibre consumption

    In annual terms, 35W continuous equates to roughly 300 kWh per year. At typical UK electricity prices, that’s approximately £70–£90 annually.

    It’s not insignificant. But in the context of running a rural home  and compared to the productivity it enables — it feels entirely reasonable.

    Wi-Fi & Integration

    The router allows easy customisation of SSID and password via the app. I reused my previous network name so all devices and visiting friends  reconnected seamlessly.

    Coverage is good. However, due to the thick walls and layout of our converted barn, I added a TP-Link signal booster. Starlink sells its own mesh node for around ÂŁ100 if you prefer to stay within their ecosystem.

    Cost

    When we signed up:

    • Equipment: ~£350

    • Monthly fee: £75

    There was only one plan available at the time.

    Now, UK residential plans start from around ÂŁ40 per month, depending on service tier and region. In some cases, equipment and professional installation are included.

    Final Thoughts

    Starlink has transformed life here.

    It has enabled a fully remote professional career, reliable streaming, smart home functionality and general peace of mind.

    It is more expensive than fibre and uses more power. But where fibre does not exist, it is not merely a luxury, it is proper infrastructure.

    If fibre eventually reaches us, I would reassess. Until then, this is the first internet service we’ve had that simply works.

    A Note on the Referral Link

    If you decide to try Starlink, you’re welcome to use my referral link below. It may give us both a small account credit. I would recommend the service regardless.

    I buy all my own gear and write independent reviews. If you found this helpful, buy me a coffee.

  • Air Source Heat Pump: Five Years of Real-World Data

    Air Source Heat Pump: Five Years of Real-World Data

    We have lived in the same house for 12 years.  We had an oil boiler for 7 years, and 5 years ago, we changed over to an Air Source Heat Pump.  I am sharing my data on oil and electricity consumption to help you decide whether this is for you.     

    My full dataset and calculations are available here:

    In conclusion

    • Over 7 years, our boiler used 5.02 litres of oil per day
    • Over 5 years, our heat pump used 13.01 kilowatt hours of electricity per day
    • Both systems delivered broadly the same amount of heat into the house in real-world use (around 43–47 kWh per day)
    • We made no major changes to radiators, plumbing or insulation in this time period
    • To compare costs yourself: Price Ă— 13.01 (heat pump kWh/day) and Price Ă— 5.02 (oil litres/day)
    • At 4 September 2026 benchmark prices -approximately ÂŁ1.01 per litre for heating oil and 26.11p per kWh for electricity, the heat pump would cost about ÂŁ3.40 per day, compared with ÂŁ5.09 for oil: an indicative saving of roughly 33%. Prices vary by tariff, region, oil order size and date.
    • Real-world, same-house comparison using measured data (not manufacturer estimates)

    Living off gas in rural Cumbria – costs, comfort and what actually changed.

    As I often say, we live in an old barn on the side of a hill in the Lake District. We have no fibre broadband, no mains sewage and no gas. Each of those has presented its own challenges, most of which I’ve enjoyed solving and writing about (see my pieces on Starlink and our sewage tank).

    Today I want to share our experience of installing and living with an air source heat pump (ASHP).  

    Our house

    The building dates from the 1800s however it was converted into a house in 2008 and has very good insulation.  We have underfloor heating in every room.  The EPC was a C before we got the heat pump fitted.  It’s 4 bedroom, 2 story, 181 square metres and, according to the EPC, the primary energy use for this property per year is 134 kilowatt hours per square metre (kWh/m2).  

    The old boiler

    In 2013, when we moved in, the house came with an oil boiler and a large 1,200-litre green plastic tank in the garden.

    Our old plastic 1200 litre oil tank.  It's the size of a small car.

    The system was relatively new and worked well with our underfloor heating. We kept it for just over seven years. The boiler was serviced annually but began breaking down once or twice a year. Replacement was inevitable. The question was whether to install another oil boiler or try something different.

    Why We Switched

    In 2021 the government was offering a ÂŁ5,000 installation grant plus Renewable Heat Incentive payments of ÂŁ188 per quarter for seven years. That made the economics worth examining.

    As I say, our house is well insulated and heated entirely by underfloor heating, which makes it well suited to a heat pump. Heat pumps operate at lower flow temperatures often around 30–45°C for underfloor systems (sometimes higher in older radiator setups) whereas many boiler systems feeding radiators are typically set around 60–70°C, and historically were often run hotter. Lower temperatures are key to heat pump efficiency, but they require a larger heat-emitting surface area either oversized radiators or, ideally, the whole floor.

    I obtained three quotes and chose the middle option at just over ÂŁ10,000. The grant paperwork required some administration but nothing excessive.

    There is currently a government Boiler Upgrade Scheme offering up to ÂŁ7,500 towards the installation of an air source heat pump. Full details and eligibility criteria are available on the official GOV.UK website

    Installation

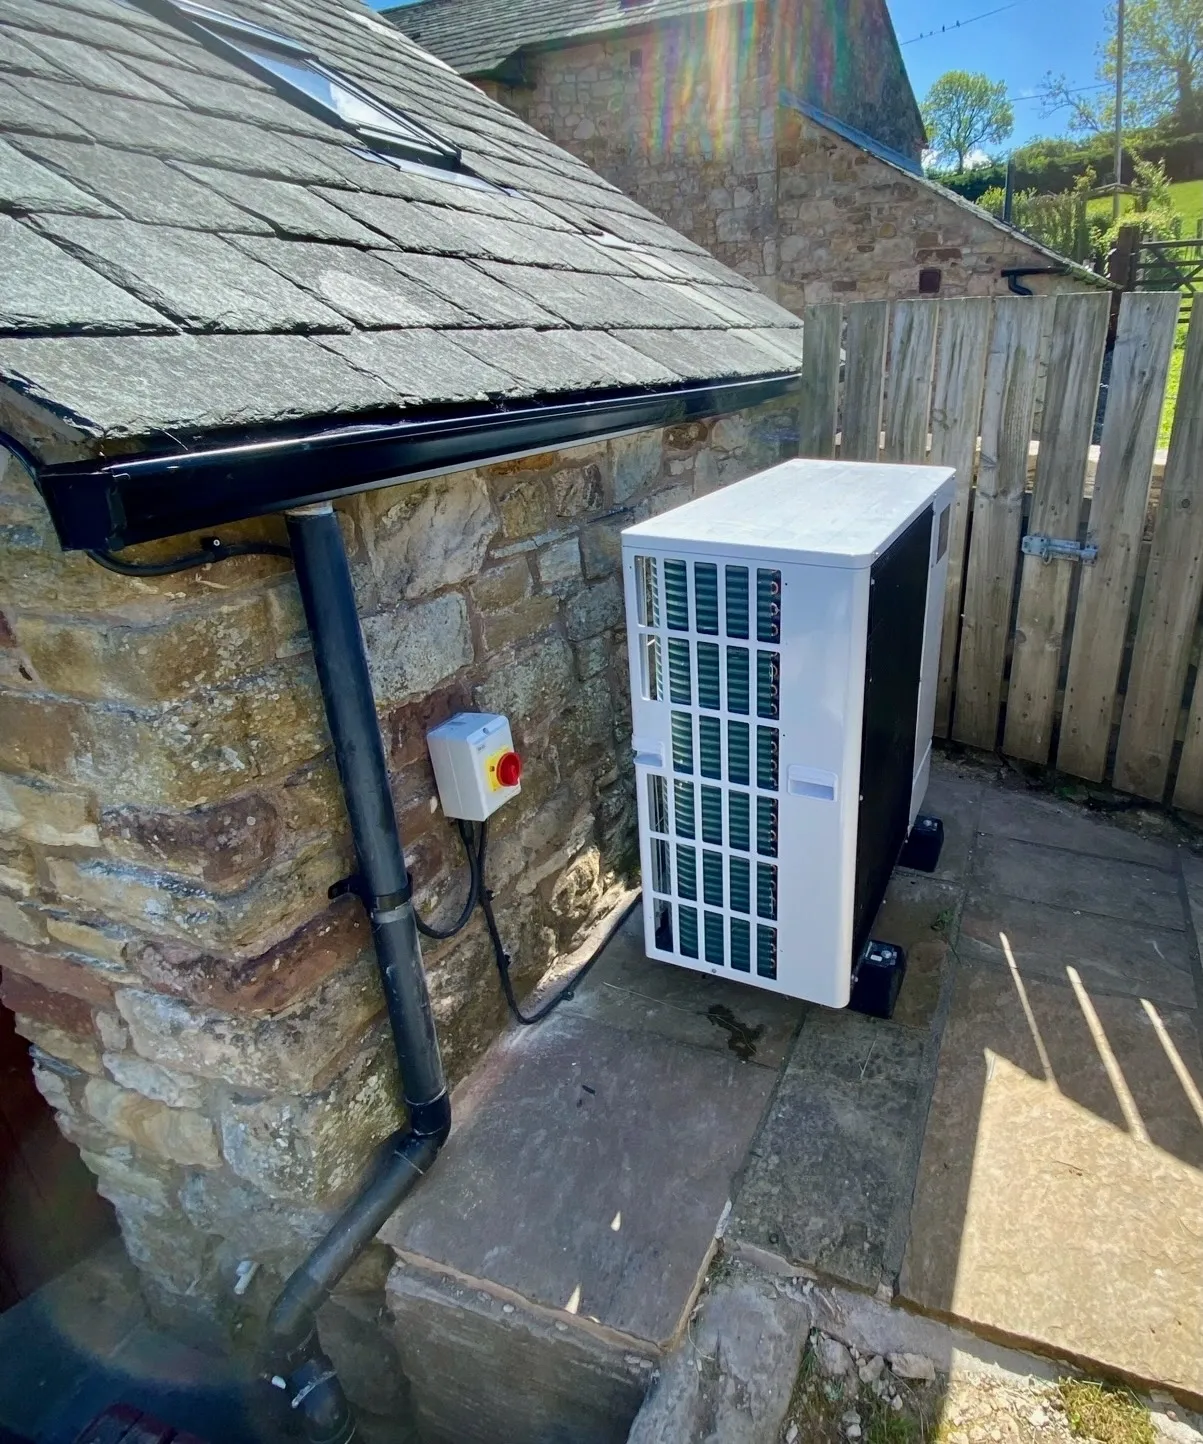
    The outdoor unit was positioned close to where the oil tank had stood, allowing the flow and return pipes to pass directly through the wall into the utility room.

    The new cylinder went where the previous hot water tank had been. Because the boiler and tank were already in that space, the plumbing alterations were relatively straightforward.

    Electrically, a heavy-gauge steel wire armoured (SWA) cable had to be run from the consumer unit to the outdoor unit. The installers routed it neatly and discreetly.

    We opted for the Wi-Fi module and a wireless thermostat to allow remote monitoring and scheduling.

    The installation took four days and went smoothly.

    The indoor part of a domestic heat pump - this is the 1000 litre hot water tank with associated plumbing and cabling.

    Five Years of Data

    We are now 1,800 days in.

    The dedicated electricity meter shows the heat pump has used 23,409 kWh.

    That averages:

    • 13.01 kWh per day

    • 4,752 kWh per year

    Running Costs

    Oil averaged ÂŁ2.31 per day over seven years between 2014 and 2021.  

    Across the period measured, our electricity averaged approximately 19p per kWh on Octopus Agile. At that rate, the heat pump cost around ÂŁ2.47 per day.

    That is close to parity, and that’s while maintaining a constant 18°C, warmer and more stable than we previously ran the house.

    Direct comparisons are complicated because both oil and electricity have been volatile.

    Oil prices rose sharply after 2022, at times approaching ÂŁ1 per litre. Electricity prices also increased, but we chose Octopus Agile, which allows us to shift usage away from peak periods. With timer control this has been straightforward.

    At today’s local prices 105p per litre for oil and 24.67p per kWh for fixed electricity — the heat pump works out at roughly 39% cheaper per unit of delivered heat.

    If you’re running on oil, you’ll know that refilling often happens either side of Christmas. When prices were at their worst, a delivery could easily be £800–£1,200. The ASHP doesn’t eliminate winter spikes, electricity bills are still higher between December and February but I smooth that by paying a standing order into a savings account throughout the year.

    Comfort and Experience

    The house has never been more comfortable. It maintains a steady 18°C with small fluctuations above and below set point. The internal environment feels more stable and humidity is lower.

    Unless it is very cold, the unit does not run continuously; it cycles efficiently to maintain temperature.

    The hot water performance has been equally effective. I have programmed it to regenerate the tank once per day, which comfortably supports three to four showers plus normal domestic use. Larger households would configure this differently.

    Unlike a boiler, you cannot raise the temperature of the house quickly on a whim. It rewards planning. If elderly relatives are visiting, dial in extra heat the day before.

    Maintenance has been minimal. I replaced two expansion vessels myself for around ÂŁ100 in parts. The oil boiler, by contrast, required annual servicing and regular call-outs.

    One practical downside is that it can be difficult to find engineers willing to service domestic heat pumps. Our original installer appears to have ceased trading.

    The Practical Differences

    • The oil tank is gone.
    • There is no smell.
    • No checking levels in winter.
    • No deciding how much to order.
    • No tanker deliveries.
    • No large lump-sum fuel payments.
    • The system simply runs. It cannot “run out” in the way an oil tank can during a cold winter.
    • We have regained a space the size of a small car where the oil tank used to be.

    Future Potential

    We have not yet added solar PV or battery storage. If we do, the economics will tilt further in favour of the heat pump. Oil offers no comparable flexibility.

    Electric heating integrates with a decarbonising grid and allows optimisation over time.

    Verdict

    We have not halved our heating bills.

    But we have:

    •  Stabilised running costs
    •  Increased comfort
    •  Reduced maintenance
    •  Removed fuel logistics
    •  Reduced exposure to oil price spikes
    •  Gained future flexibility

    For our house, the decision has proved sound.

    I buy all my own gear and write independent reviews. If you found this helpful, please consider buying me a coffee.