Tag: hiking

  • Helvellyn

    Helvellyn

    The route from Patterdale up Striding Edge and down Swirral Edge is one of the Lake District’s great circular walks, although parts of it feel less like walking and more like negotiating a geological argument.

    My walking buddies were an old school friend and some of his pals. Like many Lake District days, we met up in a pay and display car park. We chose the one opposite the Patterdale Hotel, a very reasonable £5 for the day (cash only). 

    Apple fitness snail trail of route

    We set off down the road, picked up part of the Coast to Coast path and then worked our way cross-country towards Bleaberry Crag.

    The first couple of miles were deceptively steady going. One of our group had a catastrophic walking boot failure within the first hour. Both of his heels completely delaminated; thankfully, I had some gaffa tape and a bit of paracord in my first aid kit. I was able to patch him up enough for him to return to his car. The rest of us continued. 

    Miles 3, 4 and 5 were an intensive cardio and quad workout. My average heart rate for mile 4 was 166 bpm as we hauled our way up towards the start of Striding Edge. 

    Evidence of my lack of fitness for all to see! Mile 4 was the killer.

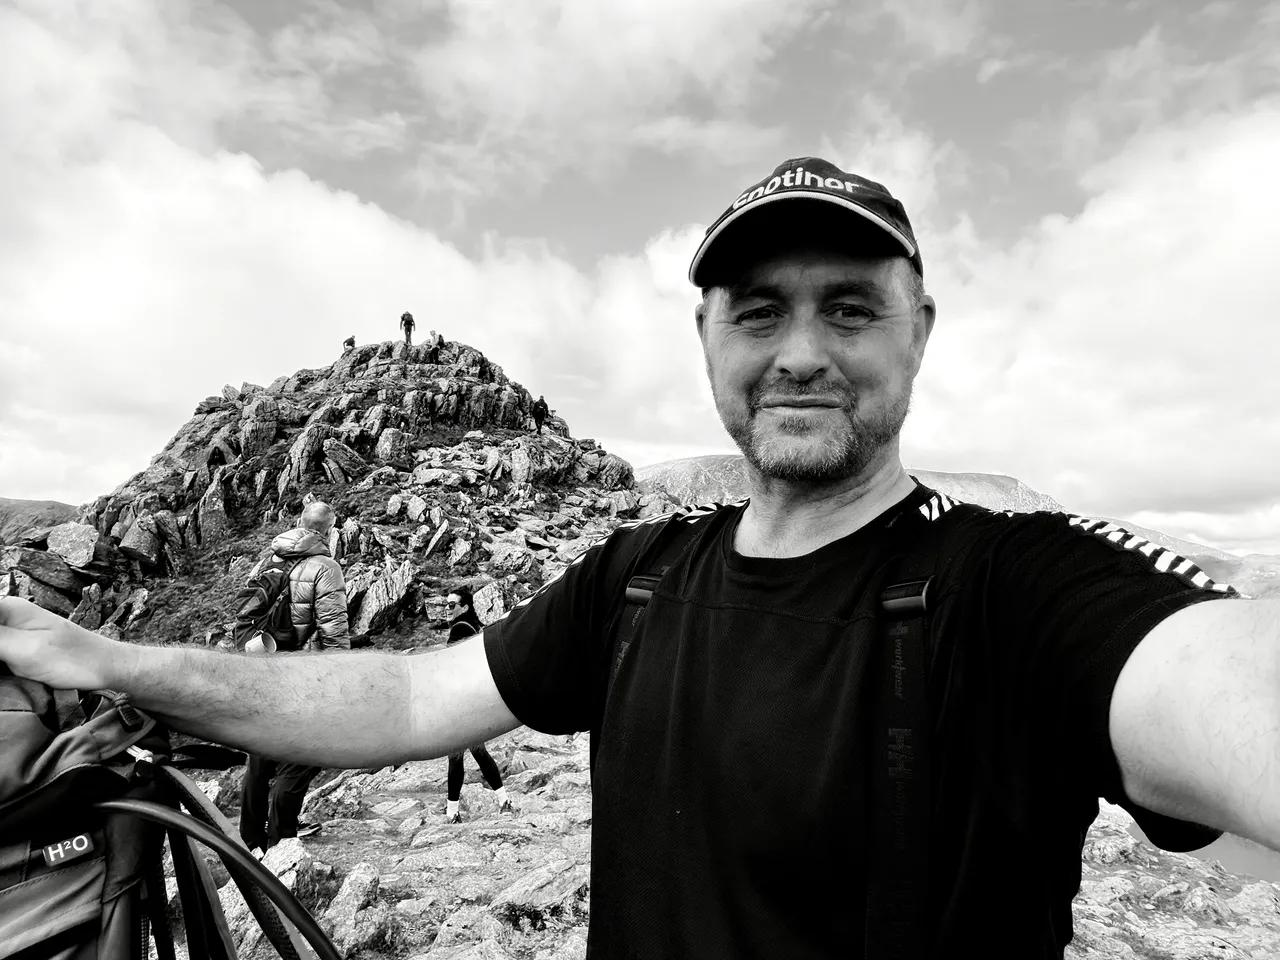
    The conditions were perfect, no low clouds, not too hot, nice and dry and no wind. It wasn’t overly busy although there was by now a steady flow of other walkers. We caught our breath before Striding Edge proper; I took on some chocolate and coffee just in case. 

    You have no choice but to take Striding Edge seriously; there are severe drops on either side – approximately 300m to the left and 150m to the right. Even on a good day, a moment of inattention could be fatal. You could also observe that this is one of the most mindful ways to spend a Saturday morning. When you’re busy thinking about exactly where your hands and feet need to be; it’s impossible to worry about anything else!

    This route is superb because you can see and anticipate the full semi-circle of Striding Edge, the summit, and Swirral Edge at all times. Rather like the rides at Alton Towers where you observe the most exciting bits as you queue up. Red Tarn is a beautiful, inky, black feature below you and to the right as you approach the summit. 

    Towards the end of Striding Edge, there is a 4-5m descent where you need to turn around and downclimb. It felt safe to me as there were plenty of good, solid hand and footholds, but it could be quite daunting. Just after that is a slightly longer scramble up leading to the Charles Gough memorial.

    The Charles Gough memorial. Click on it to learn more about it and a transcript of what it says.

    I’d forgotten all about him, but the memorial sent me down a Wikipedia rabbit hole. Gough was an artist born in 1784. Originally from Manchester, he set off to do the same walk as us on 17 April 1805. He fell from roughly where his memorial stands and died of a suspected head injury. His body was discovered by a shepherd on 27 July. His dog, Foxie, had stayed with him for all of that time, surviving by drinking from the tarn and scavenging. 

    The striking flat plateau at the top of Helvellyn

    We took a few photos and then headed down by Swirral Edge, an enjoyable route but not as difficult as Striding Edge. We chose a different way, crossing the top of Red Tarn and down into Glenridding. By the time we reached the Traveller’s Rest, we’d covered just over nine miles, climbed one of England’s best-known ridges and frightened my cardiovascular system sufficiently for one day. We took our time nursing our pints with our boots off before making the last mile through the village and back to the car at Patterdale. 

    Apple workout data

    * Distance: 10.04 miles

    * Elevation gain: 3,366 ft

    * Moving time: 5 hrs 1 min

    * Total elapsed: just under 6 hours

    * Route: Patterdale → Striding Edge → Helvellyn → Swirral Edge → Patterdale

    * Highest recorded HR: 177 bpm

    * Recovery strategy: one pint in Glenridding

    Resources

    Lake District National Park Fell Top Assessors home page 

    Lake District Weather Line winter conditions report

    Patterdale Mountain Rescue Team homepage

    If you are curious about the kit I used, here are some links so you can learn more and check prices on Amazon. None of this gear is sponsored. It’s simply what I use and trust.

    Ordnance Survey Map OL5 this is the best map for a climb of Helvellyn

    Compass – this one is decent quality, it has a few more advanced features. Could be very handy in low visibility. 

    Satellite Beacon (PLB) – rescueME PLB1 – A subscription-free personal locator beacon. I carry it on the fells and permanently in my buoyancy aid at sea, more for peace of mind than anything else.

    Whistle – Lifesystems Safety And Emergency Whistle always carry one when on the water or in the fells

    Watch – Apple Watch Ultra 3 I use the Ultra 3 for route tracking, elevation and heart rate monitoring. My review is here:

    Head Torch – LED Lenser H7R Core. I didn’t need it this time, but if there was any realistic chance of darkness I would absolutely pack it. My review is here:

    Lifesystems Mountain First Aid Kit I have carried mine since 2020 for hiking and kayaking, it’s a great all round kit. Had to replace the gaffa tape after this trip!

    Aquapac Waterproof Large Phone Case you get what you pay for, I’m very pleased with mine. Aquapac also make great map cases.

    GoPro Hero 12 – The action camera used for the POV footage. There is a newer model on sale but the 12 is still very good. 

    GoPro Clip Mount – I usually clip the GoPro onto my buoyancy aid when kayaking, but it also works well attached to a rucksack strap.

    Paracord – I’ve just ordered this to replace the section used during the emergency boot repair on this walk. Looks ideal for general emergency use.

    Gaffa Tape I now wrap a couple of metres around a Sharpie pen and keep it in my first aid kit. 

    UK Map App (the link is to the Apple App Store). This app has not got great reviews, it deserves better- I’ve had it for years. You can download maps and use it offline, it rotates based on where you are facing. I use it all the time. 

    Leatherman Wave+ One of the few bits of kit I carry almost everywhere. I’ve written a detailed review here:

    Mobile Phone Charger / Battery Bank – Anker 20K – I carry the Anker 20K power bank with built-in USB-C cable. Full review here:

    As an Amazon Associate, I earn from qualifying purchases.

    I buy all my own gear and write independent reviews. If you found this helpful, buy me a coffee.

  • MSR Dragonfly Stove

    MSR Dragonfly Stove

    Purchased: May 2020

    Used on: Sea kayak expeditions, wild camps, and coastal trips across Scotland and the North of England

    Five Years, Hundreds of Miles of Paddling

    I’ve been cooking on this stove since May 2020, and in that time it’s been with me on some of the best trips of my life- a three-day circumnavigation of Raasay and Rona off the Scottish mainland, island hopping around Arisaig and a full circumnavigation of the Isle of Bute. Days regularly running to 40 kilometres of paddling, wild camps on rock ledges and beaches, thunderstorms, swell, wind, and on the Summer Isles in July 2025 the most catastrophically bad midges I have ever encountered in my life. Through all of it, the Dragonfly performed.

    That’s the review, really. But here’s the detail.

    Why Liquid Fuel?

    The Dragonfly runs on white gas, kerosene, diesel, and petrol. That flexibility is the whole argument for it. I have petrol around constantly for the lawn mower, the chainsaw, general land maintenance. Being able to top up the stove bottle from the same stock I’m already running is genuinely convenient in a way that’s hard to overstate.  

    It’s also good to know you can easily get more cooking fuel wherever you are in the World. 

    Gas canister stoves work fine. But unless you’re doing a single day trip, you always need a spare and I know myself well enough to know I’d resent the constant purchasing. With petrol, there’s no calculating how much gas is left in a canister, no anxious rattling at camp. You look in the bottle and you know.

    If you’re an occasional user going out a few times a year, a gas stove is probably the better choice. Simpler, lighter, no technique required. The Dragonfly needs a lot more practice and commitment to use happily.  

    What It Does Well

    It’s powerful. When it’s running properly, it sounds like a small jet engine. Water boils fast, which after a long day on the water matters more than you’d think.

    It’s robust. Five years of being stuffed into dry bags and kayak hatches, and it hasn’t missed a beat.

    It’s economical. Petrol is cheap. No fuel goes to waste at the end of a trip – whatever’s left in the bottle goes straight into the car or the mower.

    It’s adjustable. The Dragonfly gives you genuine flame control.  This is useful – you can maintain just enough heat to keep your boil in the bag products at temperature without boiling over. It also comes in very handy if you are frying.  

    It’s genuinely good fun to use. There’s a ritual to it. Once you’ve got the technique down, lighting it feels satisfying. It feels a bit dangerous, there’s every chance of singeing your eyebrows each time you light it if you are not careful.  

    The Honest Downsides

    Petrol is flammable and it smells. If something goes wrong with containment especially in a kayak hatch or rucksack, it can contaminate kit in a way that gas never would. I keep it in a dedicated dry bag and have never had a problem, but it requires thought.

    There’s more to go wrong than a simple gas stove. More components, more maintenance. And the technique takes practice. The first few times you light one, it’s not intuitive.

    Premium petrol is worth using. I believe the better detergent additives make a real difference to how cleanly it burns, and fresh petrol works noticeably better than old stock. I believe MSR would prefer you to use dedicated stove fuel for optimum longevity but as I say, I’m in year 6 of mine with no issues.  

    If you want the lightest possible kit, this is probably not for you – a small gas stove would take up less space and weigh less.  This is not so much of concern for my kayaking trips.  

    How to Use It — The Technique

    Turn the dragonfly stove body upside down and shake it for sixty seconds before use. There’s a small pin inside the jet that bounces around and clears carbon deposits. Shake again after use for the same reason.

    Pump approximately 20 – 30 times to pressurise the bottle.

    Release a tablespoon of petrol into the small dish beneath the burner, then close the valve. Light the petrol in the dish and let it burn for around 60 seconds — this heats the metal of the jet, which is what allows the fuel to vaporise properly. Then slowly reintroduce flow. Not too much. Let it catch. When the flame shifts from yellow-orange to blue, it’s running correctly. Give it full flow and let it go.

    Give the bottle an occasional pump while cooking to maintain pressure.

    When you’re done, turn off at the bottle rather than at the stove. This lets the fuel line dry out, which reduces drips  and smell.

    I don’t generally go on kayak expeditions by myself and my friend Nick has exactly the same stove.  That means that if one of us breaks a pump or similar we’ve automatically got spare parts and spare fuel.  If I was going solo much I’d perhaps be tempted to get something simpler.  

    The Verdict

    The MSR Dragonfly suits a particular kind of person doing a particular kind of trip. If you’re spending multiple days out, you’re already carrying petrol, and you’re willing to learn the technique — it’s an excellent piece of kit. Reliable, powerful, and satisfying to use. It’s been on every meaningful trip I’ve done in the last five years, and I’ve never once wished I’d brought something else.

    As an Amazon associate, I earn a small commission from qualifying purchases but they do not cost you a penny extra.  

    I buy all my own gear and write independent reviews. If you found this helpful,buy me a coffee.

    Leave a Reply

  • MSR Elixir 2 person lightweight tent

    MSR Elixir 2 person lightweight tent

    I needed a good-quality, lightweight, tough tent that would be small enough to fit into a dry bag and then into the front hatch of my sea kayak. I wasn’t planning to use it for backpacking, so I felt able to treat myself to a two-person tent even though I was only planning to use it on my own.

    I looked at a few different options, but I was already a fan of MSR kit and the Elixir 2 had some great reviews. The price was in the Goldilocks zone and I felt confident choosing it.

    I’ve been delighted with it. I must have now used it on about ten different multi-day trips, each of which has involved taking it up and putting it down again every single day.

    It’s very easy to work with. I normally lay the separate groundsheet out first and peg the four corners. Next, I lay the inner tent over the groundsheet and add the four corner loops to the existing pegs. Then I put the poles together and, following the colour coding, place them into the corner tabs.

    Next, I clip the inner tent onto the poles, add the cross-brace pole across the top, and then it’s simply a case of laying the fly sheet over and pegging out the guy ropes.

    I’d say I can put it up from scratch in under five minutes.

    If you need to put it up in the rain, just do the groundsheet, then the poles, then the fly sheet — that way the inner stays dry.

    In all the times I’ve used it, I’ve only had one pole break. In all honesty, it was probably my own fault — I suspect I didn’t fully engage it before putting it under tension. MSR were ever so good to me: they sent me three spare pole segments by post, free of charge, and included instructions on how to fit them. I’ve still got two spares now; it’s never happened again.

    Pros

    Lightweight – 2.2 kg (including poles and fly)

    Spacious – plenty of room for two people, or one person and a lot of kit

    Weatherproof – has handled high winds and rain, completely bomb-proof and dry every time

    Tough – well-made; the extra groundsheet means you can pitch on rough ground or beaches without worrying

    Excellent customer service – genuinely helpful and responsive

    Cons

    Packs slightly larger than some ultralight tents, but that’s irrelevant in a kayak

    The supplied pegs are light but not very strong — I replaced mine with sturdier ones for the guy ropes

    Vestibule space is fine for storage but not ideal for cooking


    Overall, I love this tent and I look forward to using it. I never worry about whether it will look after me or not — I have full confidence in it.

    If you’d like to see more about it or buy one, here’s my Amazon link.

    Here are the MSR Groundhog tent pegs that I added to my tent bag Amazon link.

    I note there is an updated version of the Elixir 2, priced a little higher but looks fantastic – here is the link 

    As an Amazon Associate, I earn from qualifying purchases.

    I buy all my own gear and write independent reviews. If you found this helpful,buy me a coffee.

    Thanks for reading. If you enjoyed this review or spot anything that needs correcting, I’d love to hear from you — just use the comments box below.

    Leave a Reply