Category: Camping gear

  • Why I Trust My PLB1 for Outdoor Adventures

    Why I Trust My PLB1 for Outdoor Adventures

    (Affiliate link)

    If, like me, you have hobbies that might result in being winched onto a helicopter, read on!

    In a nutshell, if you find yourself in grave danger anywhere in the world, this device can send a distress signal to a satellite. It needs no subscription, phone signal or recharging. Provided you’re conscious, can reach your PLB1 and can use at least one hand, you have hope of rescue. The Survivor’s Club stories on the Ocean Signal website include many accounts of lives saved.

    I bought mine back in 2019, when I first got seriously into sea kayaking. It came before the VHF radio or LED flares, on the basis that it was the most versatile way to get help when you really need it. I’ve carried it tethered to my buoyancy aid while kayaking and in the lid of my rucksack for hill walking ever since. I’ve never had to use it.  Yet.  

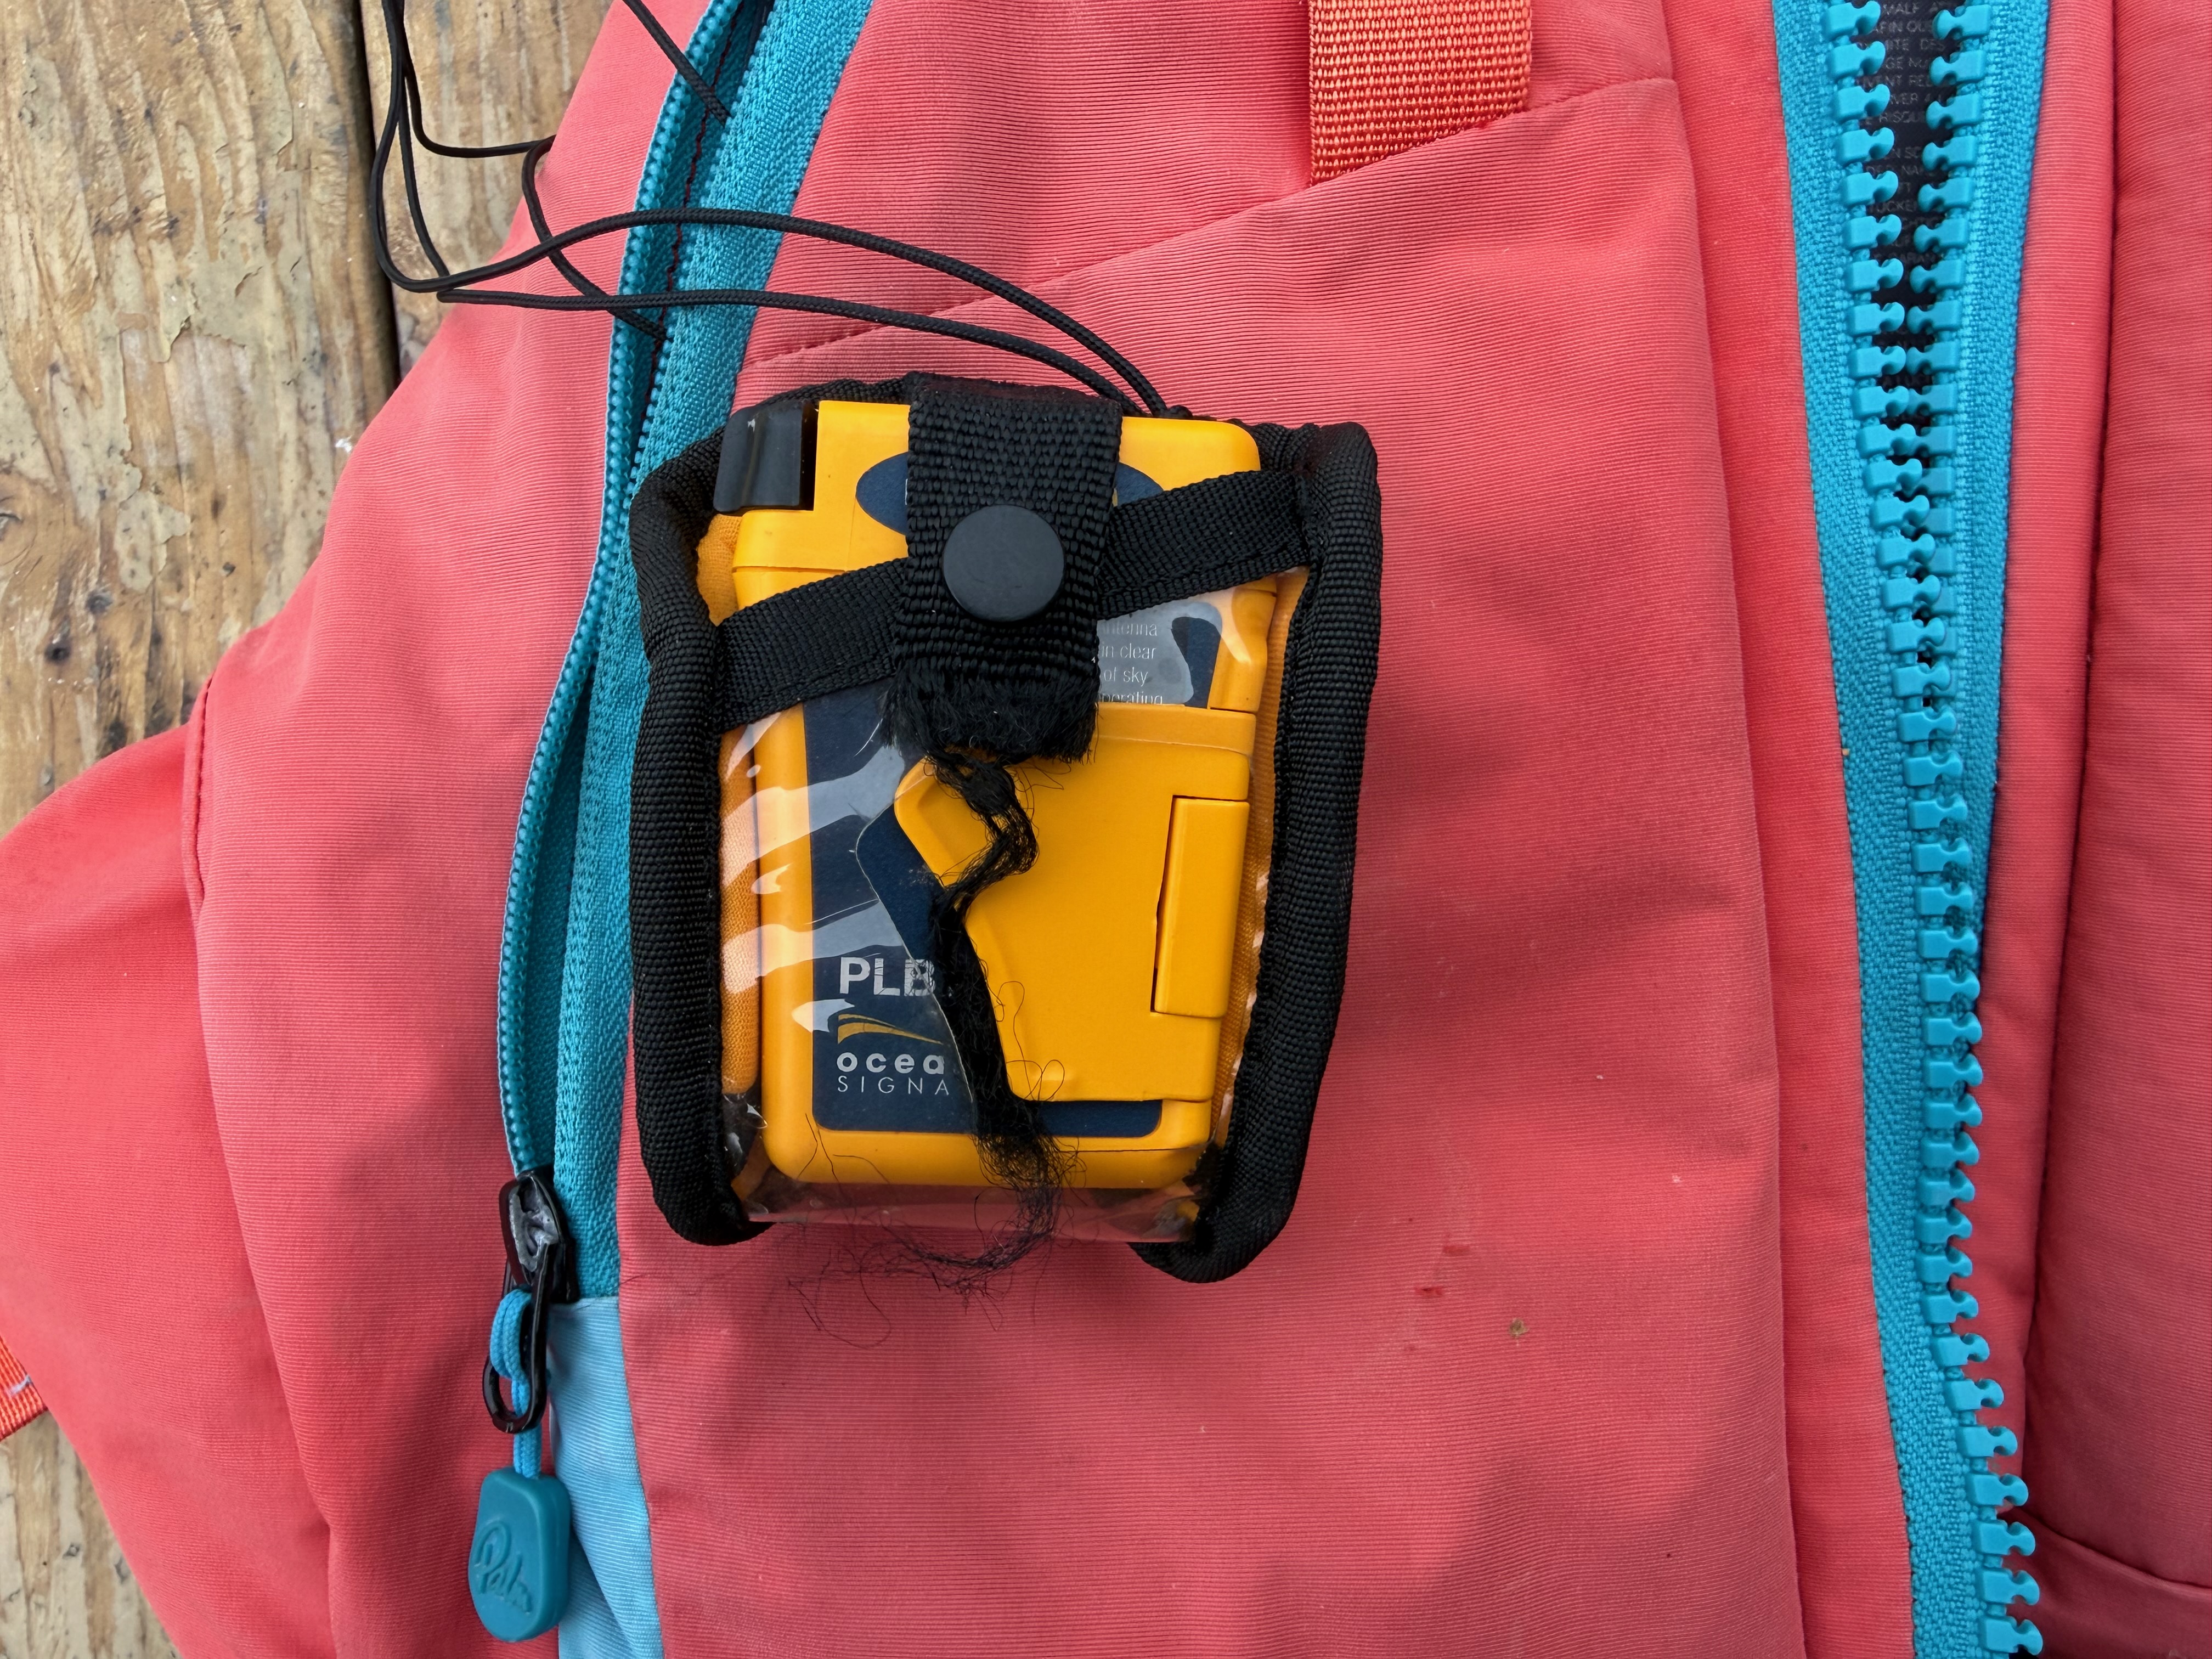
    Author's PLB1 stowed away in the pocket of his Palm Peto life jacket.  Lanyard is securely anchored to a purpose built ring inside the pocket.
    PLB1 in the pocket of my Palm Peyto buoyancy aid. There’s a small eyelet inside the pocket which I thread the lanyard through to avoid losing it.

    The PLB1 is a UK made, small, purpose-built device.  As the name suggests, it’s ‘personal’ – not for attaching to a vessel or aircraft, you need it on you.    It is also not for two-way communication, sending locations to your family, getting advice or checking the weather forecast.  It has one job only – getting help in an emergency.  No screen, just two buttons – TEST and ON.  It fits easily in the palm of my hand (77 x 51 x 32.5mm weight 116g).  

    Close up of the PLB1 - Power or ON button, T or Test button, indicator LED and separate white LED emergency strobe.  Protective cover folded open for visibility.
    My PLB1 – Test and On buttons shown, LED indicator and white rescue strobe at the top.

    You do need to register your device (for free) via this government website. I’ve just been prompted to re-do and update mine, it took 10-15 minutes.  You will need the beacon’s Hex ID or Unique Identifying Number, the manufacturer serial number and model (all stamped on the device), your contact details, and a trusted person or persons who can explain what you’re probably up to. And who are probably not with you and in the same trouble!  This step is essential for the rescuers: they need to know whether to look for a kayak, gyrocopter or hiker, and to check whether an alert is genuine.

    A short demo of my PLB1 including extending and rewinding the aerial.

    Should you press the ON button, it waits 50 seconds and then sends a 406 MHz radio signal into space.  A satellite receives the signal and alerts a ground station.   A professional assessment is then made as to what kind of help is required based on where the signal is coming from i.e. land, water, mountains etc and the registration details you gave.  The most appropriate emergency services are informed i.e. coastguard / mountain rescue / police.   

    If it can lock onto GPS, it will send your location (accurate to within 100m).  Even if it cannot get a GPS fix, the satellites can locate you to within 5 nautical miles by radio alone.  Once active, it sends out a 121.5 MHz homing transmission which rescuers can lock onto.  It also has a small, white LED strobe to attract attention. It will keep transmitting for over 24 hours if the battery is in good order, potentially less if it has been used.  The 50 second delay is to give you time to cancel if you have made an accidental activation.  

    How to use it:

    1. Pull out the antenna until it will go no further 
    2. Point the antenna vertically
    3. Open the safety flap
    4. Press the on button for approximately one second until the Green LED flashes.
    5. The LEDs will then flash periodically to confirm transmission and GPS status.  

    There is a radio test feature which you are encouraged to do monthly and a more power intensive GPS test to perform annually.  They ask that you only do this in the first 5 minutes of every hour as courtesy to aircraft (it transmits a short burst on 121.5 MHz, see instructions for details).  

    False alarms, deactivation:

    It’s quite hard to set it off by accident because there is a hinged plastic flap covering the buttons.  If you need to turn it off either because you’ve been rescued or because you’ve set it off in error, just press the ON button for one second until the red light flashes twice.  Release, wind the aerial back in and call the UK Coast Guard. 

    To be aware of:

    • It doesn’t float by itself.  You need to buy an optional buoyancy pouch.
    • It’s not designed to work in or under water (it’s waterproof to 15m, it just won’t reliably transmit).  You will need to hold it up out of the water if you are floating.
    • You don’t receive any confirmation that help is on the way or even that your message was received, it’s purely one way.  
    • There is no way to specify the kind of emergency – could be an important factor if you’re at risk of danger from other humans vs medical / sporting accidents.  
    • The built in battery has to be professionally replaced every 7 years, the expiry date is printed on the case and there are various service centres around the UK.  

    Satellite enabled smart phones and watches

    Since I got this device, mobile phones and even smart watches have developed satellite connectivity.  I’ve given some serious thought to whether I still need to carry my PLB1.  For me personally, I definitely still do, though I think for a lot of people, the watch / phone uplink would be sufficient for peace of mind.  Provided you can get an unobstructed view of the sky, it’s not wet and you have sufficient battery remaining, a consumer device could solve the problem.  If you’re on the fence about that then definitely read this page on Ocean Signal’s website PLB1 vs iPhone Emergency SOS: Which Device Should You Really Trust When There’s No Cell Coverage

    As they say, phones are more likely to be lost or damaged in whatever catastrophe led to the problem, their batteries are fickle, they don’t work all over the world, they don’t like wet hands, they don’t have a homing transmission for the helicopter, they won’t keep transmitting for 24 hours and you usually need to tap or type to make your request.  On the plus side, there is two-way communication and you’ve probably already got it for free (though Apple did hint at a service fee after the first 2 years). 

    I daresay consumer satellite tech will save a far greater number of lives due to sheer numbers of devices out there.  They are undoubtedly a great idea.   In many situations I would try my watch or phone first because they provide two-way communication. Nevertheless, I am certain they are not a complete replacement for the PLB1 in my use case.

    Author's personal flotation device - Palm Peyto with PLB1, VHF radio and emergency whistle placed on top.
    My flotation device and essential safety kit

    Have things moved on in 7 years?

    Having had my PLB1 a while, I looked online to see what alternatives there are now.  Garmin make a small device that has some amazing two-way features but it does require a monthly subscription to use.   There are one or two other similar small PLBs for example, the ACR ResQLink 400 and McMurdo FastFind 220.  These appear to offer similar capabilities to the PLB1.  

    Conclusion 

    This device is a permanent fixture in my risk assessments for my trips and adventures.  I have had some amazing experiences and made memories that will last a lifetime because of the confidence it has given me.  If I ever find myself separated from my kayak floating in the sea or taking a tumble off Striding Edge, it will be the very best money I ever spent.  If mine was lost or broken it would be replaced immediately without question.

    As an Amazon Associate, I may earn a small commission from qualifying purchases, however, they do not cost you any extra.

    I hope you found this useful, please do use the comments or get in touch, I’d love to hear from you. 
  • Anker Mobile Power Bank

    Anker Mobile Power Bank

    (Affiliate link)

    When you’ve spent good money on decent tech, you quickly realise how dependent you are on it. Phone, watch, laptop. All useful right up to the moment the battery dies.

    For trips away, especially anything off-grid, a reliable power bank stops being a nice-to-have and becomes essential.

    I chose this Anker 20,000mAh portable charger. I’ve had it since December 2025, used it on several trips, and more recently put it through a fairly obsessive round of testing at home.

    I’m very happy with it.

    TL;DR

    •  Kept my iPhone 16 Pro going for about 4 days
    •  Ran out during day 5
    •  Recharges very quickly when you get the chance
    •  Built-in percentage display is genuinely useful- way better than the 4 vague LEDs you often get 
    •  Integrated USB-C lead is a simple but excellent feature
    •  The last 10% does not do anything
    Anker power bank in use charging an iPhone, apple watch and GoPro all at the same time.  Digital display shows 57% remaining.

    Main features

    •  Built-in USB-C lead that can both charge devices and recharge the power bank
    •  Fast charging up to 87W
    •  20,000mAh capacity, roughly comparable to a MacBook Air battery in energy terms
    •  Digital display showing exact remaining charge
    •  Can charge up to three devices at once
    •  Charges itself quickly, I saw around 64W in real use
    •  Size roughly similar to an iPhone Pro in a case
    •  Weight 421g. For context, my phone is 262g and a pint of water is about 840g
    Anker battery being charged up from a mains outlet.  Digital display on the outlet confirms the battery will receive charge at 63 watts.

    What is mAh?

    Power banks are usually rated in mAh, which stands for milliamp hours.

    In simple terms, it is a measure of how much electrical charge the battery can deliver over time.

    So a 20,000mAh battery could theoretically supply:

    * 20 amps for 1 hour

    * 1 amp for 20 hours

    That is useful, but not the best way to compare devices.

    A better unit is watt hours, which accounts for voltage as well:

    Wh = (mAh × Voltage) ÷ 1,000

    Most lithium batteries use cells at around 3.7 volts:

    20,000 × 3.7 ÷ 1,000 ≈ 74Wh

    That gives you a much clearer idea of the actual energy available.

    Real-world testing

    Click here for my detailed test report

    Over about two and a half weeks, I ran a series of simple but repeatable tests to see what this battery actually delivers.

    I tracked starting and ending percentages for both the phone and the power bank across multiple sessions, including:

    * Charging my iPhone in normal overnight use

    * Charging the same phone in flight mode

    * Charging an Apple Watch Ultra

    * Charging a MacBook Air M4

    * Charging an iPad Air

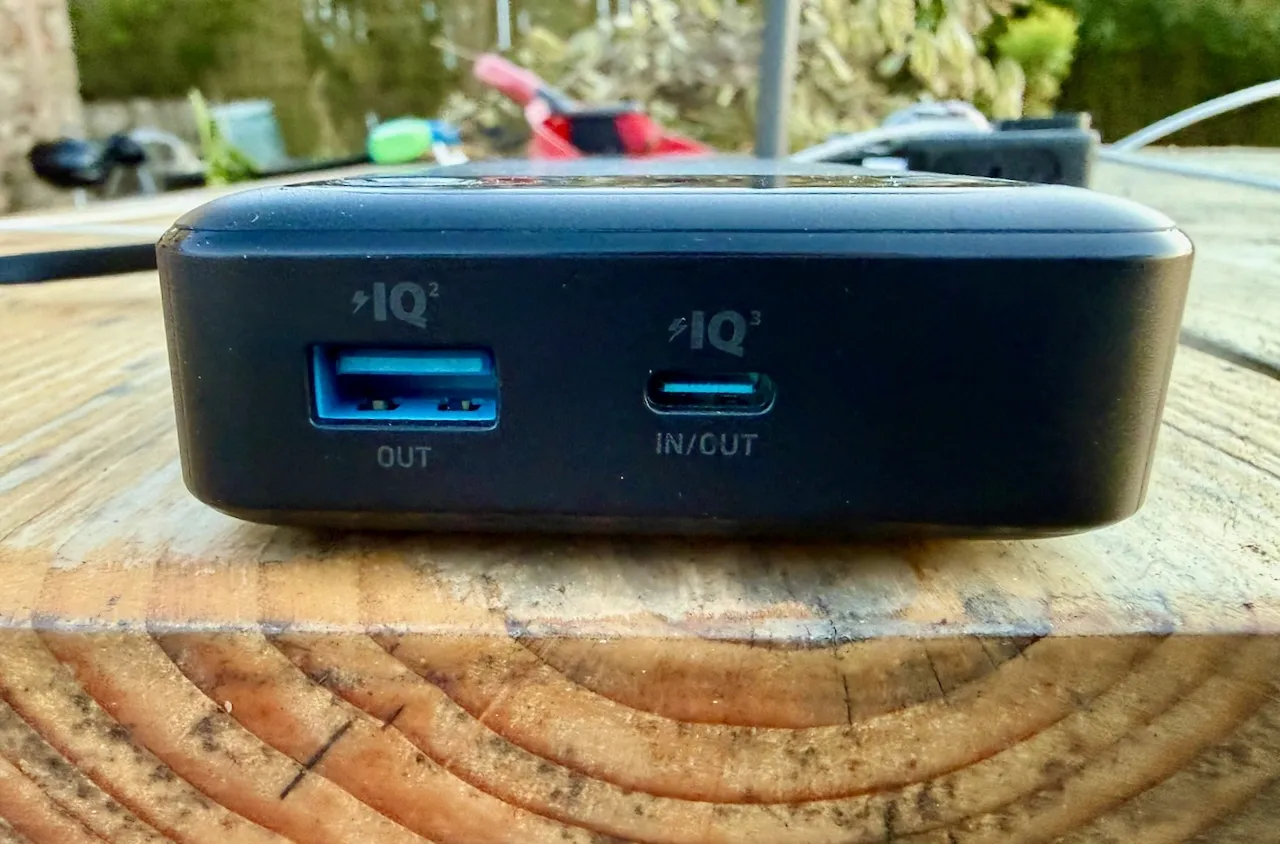
    Close up of the two ports on the end of the Anker battery - 1 x USB C and 1 x USB A.  There is an additional  built in USB C cable unseen in this image.

    What I found

    iPhone performance

    In normal use, the battery delivered around:

    2.7% of iPhone charge for every 1% of battery used

    In practice, that works out at:

    roughly 2.4 to 2.7 full charges

    With the phone in flight mode, the picture changes:

    around 3.7% of iPhone charge per 1% of battery

    That is an improvement of roughly:

    35 to 40 percent – well worth having on a camping trip.  

    What that means in real life

    A simple way to think about it is to compare how much charge you get with how much you use each day.

    From my testing:

    * Normal use gives about 240% total phone charge

    * Efficient use i.e. flight mode gives about 300%

    Worked example

    If you use around 60% of your phone battery per day, for example from 90% down to 30%:

    * 240 ÷ 60 = 4 days of use

    * 300 ÷ 60 = 5 days of use

    That matches what I saw in practice.

    Apple Watch

    The Apple Watch barely registers.

    Each 1% of the battery delivered around 14 to 15% of charge to the watch.

    In practical terms, you can charge it well over a dozen times and not worry about it.

    MacBook Air

    The MacBook is a different story.

    Each 1% of battery delivered less than 1% to the laptop.

    That is enough for a useful top-up, but not a full recharge.

    iPad Air

    The iPad sits somewhere in between.

    Each 1% of battery delivered around 1.8 to 1.9% to the iPad.

    That works out at roughly one and a half to two full charges.

    The last 10 percent

    One consistent finding was that the final 10% of the battery was not meaningfully usable.

    Across multiple tests, that last portion delivered little or no practical charge.  It is best treated as reserve rather than capacity.

    Flight mode insight

    The most interesting finding from all of this was the impact of flight mode.

    With the phone connected normally, part of the energy is constantly being used for background activity. Syncing, notifications, general housekeeping.

    Switching to flight mode removes most of that.

    The result is a noticeable increase in charging efficiency. Not theoretical, but measurable.

    It is a simple trick, but worth remembering if you are trying to stretch things over several days.

    Verdict

    This is a well thought out, practical piece of kit.

    It does exactly what you want from a power bank. It is reliable, fast to recharge, and gives you a clear idea of how much capacity you have left.

    In real-world use:

    * Expect around 2.5 to 3 phone charges

    * More if you are careful with how you use it

    * Enough capacity for a long weekend off-grid without worry

    The built-in cable and percentage display are small details, but they make a difference in practice.

    If you are heading away from reliable power for a few days, this is a sensible thing to take with you.

    Check price on Amazon

    As an Amazon associate, I earn a small commission from qualifying purchases but they do not cost you a penny extra.  

    I buy all my own gear and write independent reviews. If you found this helpful,buy me a coffee.

  • MSR Dragonfly Stove

    MSR Dragonfly Stove

    Purchased: May 2020

    Used on: Sea kayak expeditions, wild camps, and coastal trips across Scotland and the North of England

    Five Years, Hundreds of Miles of Paddling

    (Affiliate link)

    I’ve been cooking on this stove since May 2020, and in that time it’s been with me on some of the best trips of my life- a three-day circumnavigation of Raasay and Rona off the Scottish mainland, island hopping around Arisaig and a full circumnavigation of the Isle of Bute. Days regularly running to 40 kilometres of paddling, wild camps on rock ledges and beaches, thunderstorms, swell, wind, and on the Summer Isles in July 2025 the most catastrophically bad midges I have ever encountered in my life. Through all of it, the Dragonfly performed.

    That’s the review, really. But here’s the detail.

    MSR stove in use with windshield and the MSR mess kit

    Why Liquid Fuel?

    The Dragonfly runs on white gas, kerosene, diesel, and petrol. That flexibility is the whole argument for it. I have petrol around constantly for the lawn mower, the chainsaw, general land maintenance. Being able to top up the stove bottle from the same stock I’m already running is genuinely convenient in a way that’s hard to overstate.  

    It’s also good to know you can easily get more cooking fuel wherever you are in the World. 

    Gas canister stoves work fine. But unless you’re doing a single day trip, you always need a spare and I know myself well enough to know I’d resent the constant purchasing. With petrol, there’s no calculating how much gas is left in a canister, no anxious rattling at camp. You look in the bottle and you know.

    If you’re an occasional user going out a few times a year, a gas stove is probably the better choice. Simpler, lighter, no technique required. The Dragonfly needs a lot more practice and commitment to use happily.  

    What It Does Well

    It’s powerful. When it’s running properly, it sounds like a small jet engine. Water boils fast, which after a long day on the water matters more than you’d think.

    It’s robust. Five years of being stuffed into dry bags and kayak hatches, and it hasn’t missed a beat.

    It’s economical. Petrol is cheap. No fuel goes to waste at the end of a trip – whatever’s left in the bottle goes straight into the car or the mower.

    It’s adjustable. The Dragonfly gives you genuine flame control.  This is useful – you can maintain just enough heat to keep your boil in the bag products at temperature without boiling over. It also comes in very handy if you are frying.  

    It’s genuinely good fun to use. There’s a ritual to it. Once you’ve got the technique down, lighting it feels satisfying. It feels a bit dangerous, there’s every chance of singeing your eyebrows each time you light it if you are not careful.  

    The Honest Downsides

    Petrol is flammable and it smells. If something goes wrong with containment especially in a kayak hatch or rucksack, it can contaminate kit in a way that gas never would. I keep it in a dedicated dry bag and have never had a problem, but it requires thought.

    There’s more to go wrong than a simple gas stove. More components, more maintenance. And the technique takes practice. The first few times you light one, it’s not intuitive.

    Premium petrol is worth using. I believe the better detergent additives make a real difference to how cleanly it burns, and fresh petrol works noticeably better than old stock. I believe MSR would prefer you to use dedicated stove fuel for optimum longevity but as I say, I’m in year 6 of mine with no issues.  

    If you want the lightest possible kit, this is probably not for you – a small gas stove would take up less space and weigh less.  This is not so much of concern for my kayaking trips.  

    How to Use It — The Technique

    Turn the dragonfly stove body upside down and shake it for sixty seconds before use. There’s a small pin inside the jet that bounces around and clears carbon deposits. Shake again after use for the same reason.

    Pump approximately 20 – 30 times to pressurise the bottle.

    Release a tablespoon of petrol into the small dish beneath the burner, then close the valve. Light the petrol in the dish and let it burn for around 60 seconds — this heats the metal of the jet, which is what allows the fuel to vaporise properly. Then slowly reintroduce flow. Not too much. Let it catch. When the flame shifts from yellow-orange to blue, it’s running correctly. Give it full flow and let it go.

    Give the bottle an occasional pump while cooking to maintain pressure.

    When you’re done, turn off at the bottle rather than at the stove. This lets the fuel line dry out, which reduces drips  and smell.

    I don’t generally go on kayak expeditions by myself and my friend Nick has exactly the same stove.  That means that if one of us breaks a pump or similar we’ve automatically got spare parts and spare fuel.  If I was going solo much I’d perhaps be tempted to get something simpler.  

    Author using MSR Dragonfly stove to prepare a meal whilst wild camping on a kayaking trip in Scotland.

    The Verdict

    The MSR Dragonfly suits a particular kind of person doing a particular kind of trip. If you’re spending multiple days out, you’re already carrying petrol, and you’re willing to learn the technique — it’s an excellent piece of kit. Reliable, powerful, and satisfying to use. It’s been on every meaningful trip I’ve done in the last five years, and I’ve never once wished I’d brought something else.

    As an Amazon associate, I earn a small commission from qualifying purchases but they do not cost you a penny extra.  

    I buy all my own gear and write independent reviews. If you found this helpful, buy me a coffee.