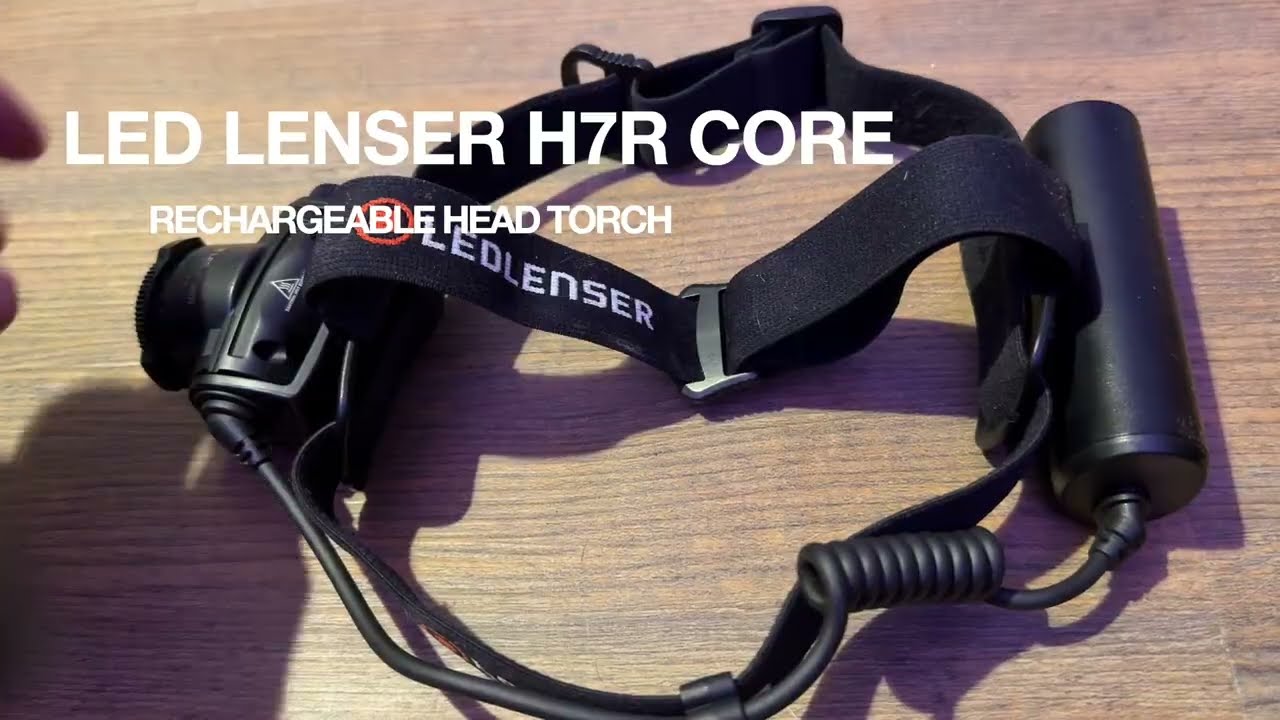
The Ledlenser H7R Core is a waterproof, rechargeable head torch with a high powered fully adjustable beam. I’ve had mine for almost a year and used it heavily. I can honestly say I look forward to using it and it lets me get on with all the things I need to do in the dark. I only review things that I’ve bought with my own money and tested fully. I recommend this torch to anyone else who is more than just a casual user.
(Affiliate link, I may earn a small commission if you buy via my link but at no extra cost to you)
Video demonstration of the torch features, controls and effectiveness in the dark
Why I chose the H7R Core
I am a very demanding torch user; I get through a lot of them, and I’m quite hard to impress. I live in a rural part of the Lake District, we get frequent power cuts, I do a lot of camping, I walk my dogs twice a day, every day of the year, and I work full time. As you can imagine, this means I’m often dependent on a torch. I find head torches vastly more practical for most situations, though they tend to be less robust than handheld ones.
I used to use a Black Diamond head torch, but I was never that pleased with it. The buttons were not intuitive, the batteries were part of the light unit, making it feel unbalanced, and after I dropped it, it died.
With a clear sense of what I didn’t want, I decided on the Ledlenser H7R Core.
Pros:
Waterproof and dustproof (IP67 rating – dustproof and capable of surviving temporary shallow immersion). It feels rugged.
Rechargeable – no need to carry spare batteries around and it has power remaining LEDs.
Battery pack sits separately to the lens for better comfort and balance.
Simple analogue controls work well with gloves.
Adjustable brightness, tilt and beam angle.
Travel lock stops it turning on in your bag.
Very bright (if you want it to be) – up to 1,000 lumens.
Decent battery life (if you don’t run it on high power for too long).
Seven-year manufacturer’s warranty (if you register it).
Battery is removable and in theory replaceable.
Cons:
Not the cheapest; however, I am happy with what I paid for mine.
Recharge time takes a while (3.5 hours from empty) – fine if charging overnight, less so if you’re on the move.
Charging cable is bespoke – not USB-C, so it’s another cable to carry (or lose).
The claimed maximum power of 1,000 lumens needs caveating – see below.
It weighs 259 g – for comparison, an iPhone 16 Pro Max weighs 227 g. It’s not ultralight, and it takes up a reasonable amount of space.
This is the charging cable / system. The magnet is not very strong and it can get knocked off quite easily but it’s never been an issue for me.
The 1,000-Lumen Boost Explained
The power ranges from 15 lumens (enough to read a book when you’re in your tent) up to 1,000 lumens, which is very bright indeed, with a range of 250 metres. However, the maximum rated normal output is 600 lumens, which still provides a 200-metre range. That is more than enough for everything I’ve ever needed.
If you want to use boost mode, turn it on as normal, then double-tap the power button, and you will get a 10-second power surge. It will then drop back to the previous setting.
It could be useful, I suppose, but in all honesty, I’ve never bothered with it.
Power button surrounded by power dial. Focus ring is on the front of the unit.
Controls
Power button – press once to turn it on, press again for reduced power, and press again to turn it off. For boost mode, see above: press once to turn it on, then double-tap for a brief increase. The button feels solid and is easily located in the dark or with gloves on.
Brightness knob – nicely ribbed and surrounding the power button. It is not mechanical; it will turn infinitely without a stop. It adjusts beam intensity and is very granular, offering fine control. Turn the power down for reading / close work and up only when you need the extra range.
Focus ring – sits around the bulb unit and has ribs and three large lugs. Its range of motion is only about 10 degrees. It offers excellent control, from a wide-angle floodlight to a narrow beam for distance work.
Tilt – the whole lamp unit tilts vertically, so you can position it accurately whether you’re doing DIY or searching for your dog. It will do what you need.
This is the supplied battery next to a normal AAA for comparison.
Verdict
I have used mine for daily dog walks, canal-side runs, DIY and a five-day autumn wild-camping trip to Croatia. It’s been superb, a real workhorse and totally reliable. I enjoy using it, look forward to my walks in the dark, don’t have to keep buying batteries or carrying spares, and don’t have to worry about the weather. I recommended it to my friend Nick, and he ended up buying a second one for his wife.
I tend to use it at almost full power for approximately 1.5 hours a day in winter and recharge it every couple of days. I’ve never actually had it go flat on me because there are LED power indicators. On one occasion, when the battery was almost exhausted, the light flashed and dropped to a much lower brightness.
If you’re in the market for a premium head torch that you will look forward to using, this should be on your shortlist.
Here’s me wearing my torch on a recent wild camping trip to Croatia.
From 60 metres out, I started to think that maybe the group of people on the beach might be naked. Their bodies were a remarkably consistent colour, all of them. Not a hint of fabric.
There was nowhere else for us to land so we paddled closer.
Yep. Definitely naked. Three generations by the look of them.
A hirsute, confident lady in her fifties sat on the pebbles, arms back, palms on the ground, legs bent at the knee. She was pointing it directly at the setting sun.
We ignored them as best we could and aimed for the opposite end. They all stared at us as if we were the weirdos!
The beach was made of rounded-off white cobbles, peaty soil and a little orange sand. With so little tidal movement, there were established plants dotted all over.
We pulled the kayaks to the tree line and put our tents up. After about 45 minutes the nudists departed – swimming back to a chartered yacht anchored in the bay.
We now had the place to ourselves; we celebrated with a swim and many cans of beer.
This was only day two.
Day 1: 15.5 km; Day 2: 35.8 km; Day 3: 28.4 km; Day 4: 25.8 km; Day 5: 18.0 km.
Planning your own kayaking trip to Croatia?
This is the story of five days exploring the islands around Split with my friend Nick.
Forty-eight hours earlier, Nick and I were tucking into a shepherd’s pie at his place in Bedfordshire, poring over weather forecasts and maps. We had booked a five-day self-guided sea kayak expedition with Red Adventures, a company based in Split, Croatia. They would provide us with kayaks, camping kit, maps and local advice. We were already on version two of the route owing to a substantial wildfire on the island of Brač. There was a stream of WhatsApp messages flying back and forth between me and Dejan, our guide.
Our flight was at 0620. As we approached Split airport, I recognised all of the places we planned to paddle to out of the window.
Nick can’t remember much about that.
We were met by Mario from Red Adventures. I had wondered how we would recognise him, half expecting a man with a sign saying Robert and Nick. But actually, it was a Vauxhall Vivaro with two upturned sea kayaks on the roof that led us to him.
He dropped us off at Lidl so we could stock up on essentials. This was mostly beer and water, suncream, crisps, snacks and some tins of fish just in case.
The Red Adventures kit was then explained and handed over: two sleeping bags, two roll mats, two kayaks, three paddles and one tent.
“Wait a minute,” I said.
“We ordered two tents.”
A look of confusion swam across Mario’s face. He’d imagined this was a very different kind of trip. He drove back to Split to fetch us another tent while we put everything into dry bags and set up the kayaks.
They were decent boats. Well used but strong and plenty of life left in them. They had rudders which neither of us had used much before. We managed to fit everything in with space to spare and set off.
Day 1 – Trogir to Drvenik Veli
The recommended route was to paddle out of Trogir Bay, follow the mainland coast for several kilometres and then cross to Drvenik Mali for a beach wild camp.
I made a bit of a mess of that before we even left the bay. Father Ted explains it much better than I ever could – it’s hard to tell if you’re looking at small rocks that are close by or big islands that are far away! Without any real sense of where I was or what I was looking at, I’d changed route anticipating the islands were a lot closer than they actually were. The map didn’t yet mean much to me without the familiar OS grid squares.
One of several motor boats that passed close by on this crossing. At least they waved at us.
We found ourselves about 2km from land just as the wind picked up. I should introduce the Croatian wind at this point. Before we got there, we were told that the winds all have their own names. I had given very little attention to this seeing as I live in the Lake District. Surely wind is wind? Wrong! The wind we experienced on this crossing was Maestral. Our guidebook says:
“Although not dangerous as Jugo and Bura, it can be quite tiring and joy killer.”
It was indeed. We never felt at risk, but the waves were big enough to become the main event, and the headwind made it feel as if we were paddling uphill. We were still getting used to the boats, and on two hours’ sleep the crossing felt gruelling.
We diverted around a headland into a village called Drvenik Veliki which, confusingly, has almost the same name as the island it is situated on: Drvenik Veli. We were within sight of the island we were supposed to be going to – Drvenik Mali.
There was not a soul to be seen as we pulled the boats up the slipway. Half a dozen fishing boats were moored, a couple of vehicles parked up.
Some links in this article are affiliate links. If you book or buy through them, I may earn a small commission at no extra cost to you.
Not fancying the crossing, we spoke to Red Adventures for advice and within minutes, they had us booked into a smart, modern apartment (affiliate link) 100 yards from where we landed. €90 for the night, cash. A bargain under the circumstances.
Front door
Interior view
I got the bed this time. Nick owed me after I took the caravan in a barn on our last trip. He took the sofa.
That evening we ate like kings at Prsuta3 By The Sea, an authentic, busy little pizza restaurant. Neither of us thought to take our torches with us. It was dark by the time we staggered home by the light of our iPhones.
Day 2 – Drvenik Veli to Drvenik Mali
We had breakfast from the bakery and then paddled clockwise around Drvenik Veli (the island). This was a totally different experience, hardly any wind, flat seas and bright sunshine. We started to warm to the boats and I managed to get used to the gridless map we had been given.
The Blue Lagoon was teeming with motorboats and trendy young people so we left them to it and carried on.
Just around the corner we found this little cove and stopped for some cliff jumping and snorkelling.
Taking it in turns to jump off the cliffs
We aimed for the village of Uvala Borak over on Drvenik Mali hoping for lunch, but it was like a ghost town, everything was shut with no sign of re-opening.
Things improved on the south coast where I enjoyed one of the top ten steaks of my entire life at Rina Mare even though the waiter did give us a lot of side eye for our damp clothing. The padded upholstery was snatched off the chairs before we were allowed to sit down.
We had an excellent evening, the family of nudists adding an extra layer of interest.
The campsite was very well used. It’s a shame there has been so much toileting in the woods, Nick and I debated who might be responsible. My theory was yachties; Nick thought they would use the “heads” on board. The issue was to be well and truly settled the following evening.
Day 3 – Drvenik Mali to Šolta
We stopped for lunch at Maslinica, an archetypal Croatian village on the island of Šolta. We landed on the beach, carefully avoiding swimmers and sunbathers, then walked down the narrow road past a bakery, numerous café-bars and tourist shops. The harbour water was pristine and teeming with small fish; the whole place had a great atmosphere.
After another steak and chips, we stocked up on essentials at the supermarket. I noted with some satisfaction the young lad on the till bollocking a group of youths who tried to walk in wearing beachwear. I’d read about this on the internet: apparently, it’s a terrible faux pas here to go into shops uncovered.
The wind really picked up as we headed out again. This time it was coming from the south, meaning the waves not only hit us side-on but also had a good 100km of open sea between us and Italy to gain momentum. The coastline was mostly sheer cliffs, we had to paddle 100m or so out from them to reduce the bounce back effect. Progress was very slow, one wave in 20 was supersized and required us to make a sharp turn to try and take it head on.
The water was warm, it felt less threatening than the same conditions would in Scotland where we normally paddle. I’d say it was 90% exhilarating, and 10% concerning. I ended up paddling on full right rudder with most of my strokes on the left side to work against the driving waves. Nick and I totally lost sight of each other in the troughs, and it was difficult staying a sensible distance apart.
Kayakers use the word “committed” at times like this. We had come a long way from the safety of Maslinica and were now more than halfway to our destination. Turning back would have been riskier than carrying on. Nothing for it but to try and stay upright, have eyes in the back of our heads and keep paddling forwards.
I have quite a relaxed paddling style, which means I can let the boat pitch and roll beneath me without it affecting my centre of mass too much. It also enormously helped that the kayaks were heavily loaded with beer and fresh water after our supermarket stop. This meant they were far less easily bullied by the waves.
We stopped for a rest twice when there were gaps in the cliffs. There was not much signal and it was hard to get a refresh on the weather forecast.
We spent half an hour here trying to guess the purpose of these structures. We agreed that, with no disrespect to the owners, this was not the kind of place a lady would ever visit consensually.
Eventually, we made it to Tatinja Bay. Our guidebook suggested the middle “sleeve” for camping. As soon as we turned 90 degrees to the waves, they picked us up and surfed us forwards. The rudders made this excellent fun! I rammed the beach at cruising speed and partially capsized getting out. We just sat there for 10 minutes, grateful to have made it.
There was a fallen tree on the beach which we used to hang our kit on. The guidebook suggested camping on the stones, but we didn’t fancy that, so we explored the woods behind.
There was a deep, stone lined pit just behind the beach, I initially thought it was a water cistern, but I’ve since researched it and think it was a lime kiln. There are a lot of them near where I live but they look quite different! Sadly this one had been used as a landfill, mostly plastic marine waste but also general rubbish. Things were not a lot better once we stepped into the woods – every clearing of the trees was covered in stained toilet tissue. Someone had even threaded a loo roll over a twig for an extra degree of convenience! The map showed a restaurant in the next bay but neither of us fancied climbing the steep, turd strewn path up through the woods so we decided to stay put.
Whilst we were unpacking, a sailing yacht anchored up 100m or so out into the bay. A small rubber dinghy with an outboard motor separated from it and headed our way. The waves were still substantial even in the shelter of the bay. This made no sense at all, there was nothing for them here!
The penny dropped when they landed awkwardly and waddled into the woods behind us in a rather sheepish fashion. Three minutes later they were off, one of them deciding to swim back. I mentally saluted his commitment to hygiene and consideration for his cabinmates, if not for his visit to our beach.
Five minutes later, a man and a woman swam ashore from the same yacht. They stood up in the shallow water and shuffled backwards onto the beach before taking their flippers off. They spoke English and, after a bit of awkward small talk, flippered away again in search of somewhere a bit more private.
We made the best of our home for the night. Nick found an abandoned camping roll mat which we split in two and used to lie on our backs on the stones drinking beer and spotting shooting stars and satellites. It was a magic moment, especially when the moon came out. We were treated to distant thunder and lightning. By the time the rain started we were ready for sleep.
Day 4 – Šolta to Čiovo
We had a good night’s rest and the weather was perfect when we woke up. We debated our options with our guide over WhatsApp. The forecast was still worrying, with strong southerly winds expected again, so the advice was to head back towards Split and remain in more sheltered waters. We were torn because we had set our hearts on paddling to the Cold War submarine tunnels on Brač. We already knew that wildfire had affected that entire stretch of coast the week before, but we had hoped to see it from the sea. The tunnels were about 21km from where we were, and we would have been badly exposed if the forecast proved correct.
We took the sensible option and followed the advice from Red Adventures. After crossing from Šolta to Drvenik Veli, we faced the 6km open crossing to Čiovo.
It was absolutely flat calm, so much so that we overtook a sailing yacht. We felt a little cheated because we could easily have reached the submarine tunnels in those conditions. That’s kayaking for you.
We decided to spend the night on a commercial campsite, “Camping Labadusa” which was very handy being adjacent to three bars and just behind the beach.
We had a delicious evening meal at Konoba Dida Ivo – mixed grill and chips followed by another round of beers and a game of cards at Konoba Labadusa. A really fun night as we were nearly at the end of our trip, we had made some great memories and the pressure was off. Nick told me about a friend of a friend who had been worried about a substance misuse test. He visited a beautician’s and had every single hair removed from his body, eyebrows the lot.
“Imagine turning up to work like Morph.”
This really tickled me.
As we finally got to bed, a group of young people seemed to be hell-bent on forming a polycule about 6ft from our tents at the top of the beach. None of them were English but it was their common language, so they spoke loudly and slowly. It was quite embarrassing after a while, and I was building myself up to having a word when Nick beat me to it. He very politely pointed out they were next to a campsite and asked them if they would mind perhaps moving down the beach a little. They were good natured.
Day 5 – Čiovo to Split
We both felt a bit sluggish, a combination of not enough sleep, too many beers and four days on the water. If we were not heading home, today would have been a natural point to stay on land for a rest.
Our suggested route included a couple of discretionary diverts but neither of us felt like doing them so we soldiered on heading directly for Split itself. The south coast of Čiovo was unremarkable, we paddled into the bay for a look at the main town – Okrug Gornji.
There were few signs of life, just a couple of joggers. Some buildings had large, black cylinders on their roofs; we concluded they were solar water heaters. We stopped for a rest at Beach Leo, crisps for breakfast again!
The crossing from Čiovo to Split was 2.1km. From there, we could see almost our entire route: Trogir, where we had started; the islands we had visited; and the one we had not quite reached.
Our guide had dropped a pin on the map at Plaža Prva Voda, just beyond a swimming area on the outskirts of Split. The iconic football stadium and modern tower blocks told us we were returning to civilisation. I surprised myself by going from feeling tired and ready for the end to being incredibly melancholy as we made our final few paddle strokes. It had been a brilliant trip. We were early for our meeting, so we took our time airing some of our wet kit, got changed and then indulged ourselves in one final steak and chips at Restaurant Lučica.
The Verdict – Five Days Kayaking in Croatia
Would I recommend a self-guided sea kayaking trip in Croatia? Absolutely. We had a thoroughly enjoyable five days. However, I would only recommend the self-guided option to experienced, safety-conscious sea kayakers. You need to be comfortable managing physical risk and some legal uncertainty, particularly around wild camping and offshore kayaking in Croatia. If you are in any doubt, choose one of the guided options instead.
How much did our Croatia kayaking trip cost?
Item
Per person
Red Adventures
€450
Food, drink and accommodation
€500
Flights
£200
Total
€950 + £200
The €450 we paid Red Adventures included single sea kayaks, upgraded carbon fibre paddles, tents, sleeping bags, inflatable roll mats, cooking equipment, maps, airport transfers, PDF guidebooks provided in advance, storage of our flight cases and crucially ongoing support and advice based on weather and our progress.
We spent another €500 each on food, drink, campsites and our unexpected night in an apartment. We certainly didn’t go hungry or thirsty. Most evening meals, including drinks, came to around €90 for the two of us.
We paid for everything ourselves. This wasn’t a sponsored trip, and Red Adventures didn’t know I was planning to write about it.
What worked well
The planning and support
We were very honest with Red Adventures about our experience and capabilities. This allowed them to balance adventure with safety, particularly when the weather became challenging.
We did our best to follow the instructions, kept them updated with our location and gave accurate accounts of the conditions we were experiencing. It worked very well.
The tents were functional and the sleeping bags were rated down to a positively tropical +20°C!
Electronics and navigation
We had several electronic devices to keep charged, including phones, cameras and watches. We took ample power banks and rapid mains chargers and finished the trip comfortably.
Mobile phone coverage was mostly excellent, frequently with fast 5G connections.
I’m glad we brought our own VHF radio, PLB, map case, compass and head torches, as these weren’t included in the supplied equipment. We also had a few of our own dry bags, tea bags and cups. Although dry bags were supplied, they were mostly very large and it’s much easier to pack several smaller bags into a kayak.
I have sworn by the free XC-Weather app for years and once again it was essential on this trip. I have my wind forecast set to Beaufort wind scale which is best for kayaking.
Food, water and money
We took plenty of cash and needed almost all of it. Card payments weren’t always an option, particularly on the smaller islands.
We were warned not to rely on the tap water on Drvenik Veli and Drvenik Mali. I was glad I’d brought my Sawyer Mini water filter [affiliate link], which helped us keep stocked up. It is not a desalination filter and can only be used with fresh water, such as tap or stream water. There were no streams or rivers along our route, unlike Scotland, where we usually paddle.
We also carried our passports, which we needed when checking into the campsite.
The Croatian sea
The water was dramatically warmer than we’re used to. That made swimming, snorkelling and generally messing about in the sea much more enjoyable. It also made the rougher conditions feel less intimidating, although warm water doesn’t make big waves any less capable of causing trouble.
What would I do differently?
Have a settling-in day
Going straight from the plane onto the water and into fairly challenging seas after two hours’ sleep wasn’t ideal.
We’d never paddled these particular kayaks before, we weren’t familiar with the geography, and we were carrying five days’ worth of equipment.
A day to get used to the boats, explore Trogir, rest, charge our devices and generally get ourselves organised would have been sensible.
As it turned out, we ended up doing almost exactly that by default when the weather forced us to stop at Drvenik Veli. Next time, I’d plan it deliberately.
Paddle fewer kilometres and explore more
This is probably my biggest regret.
We were so intent on following the routes and making progress that we didn’t stop to investigate enough of the interesting things we passed.
There were villages, little harbours, ruins, war relics and places we could easily have spent several hours exploring.
Things to know before sea kayaking in Croatia
Camping isn’t straightforward
There aren’t that many suitable places to camp, particularly if you’re looking for somewhere accessible directly from the sea.
Wild camping is generally prohibited in Croatia, although our guide explained that it is tolerated in remote locations. That shouldn’t be taken as permission, and it’s worth checking the rules before planning an itinerary around it.
Some stretches of coastline are very exposed
There are long sections of coastline, particularly along the southern sides of the islands, where landing is difficult or impossible.
The cliffs can continue for kilometres without a beach or sheltered inlet. This makes careful route planning and attention to the weather essential.
Offshore kayaking regulations are surprisingly restrictive
The published Croatian maritime regulations generally restrict kayaks to within 300 metres of shore during daylight only, with provision for longer crossings when accompanied by a suitable motor-powered vessel.
In practice, independent sea kayakers continue to make crossings between the islands, but I haven’t established whether any exemptions or other arrangements apply to self-guided expeditions like ours.
If you’re planning a similar trip, I’d strongly recommend checking the current requirements and making sure you are comfortable with any risks. Also think carefully about the requirements of your travel insurance policy.
Language and people
Everyone we met spoke good English and was generally very welcoming, if occasionally a little cautious at first. It helped that we’d practised a few words of Croatian – bok (hello), molim (please) and hvala (thank you). Our pronunciation was dreadful, but people generally smiled at our efforts and seemed to appreciate them.
Would I do it again?
Yes, without hesitation.
If you would like to learn more about some of the kit I used on this trip, here is my list:
If, like me, you have hobbies that might result in being winched onto a helicopter, read on!
In a nutshell, if you find yourself in grave danger anywhere in the world, this device can send a distress signal to a satellite. It needs no subscription, phone signal or recharging. Provided you’re conscious, can reach your PLB1 and can use at least one hand, you have hope of rescue. The Survivor’s Club stories on the Ocean Signal website include many accounts of lives saved.
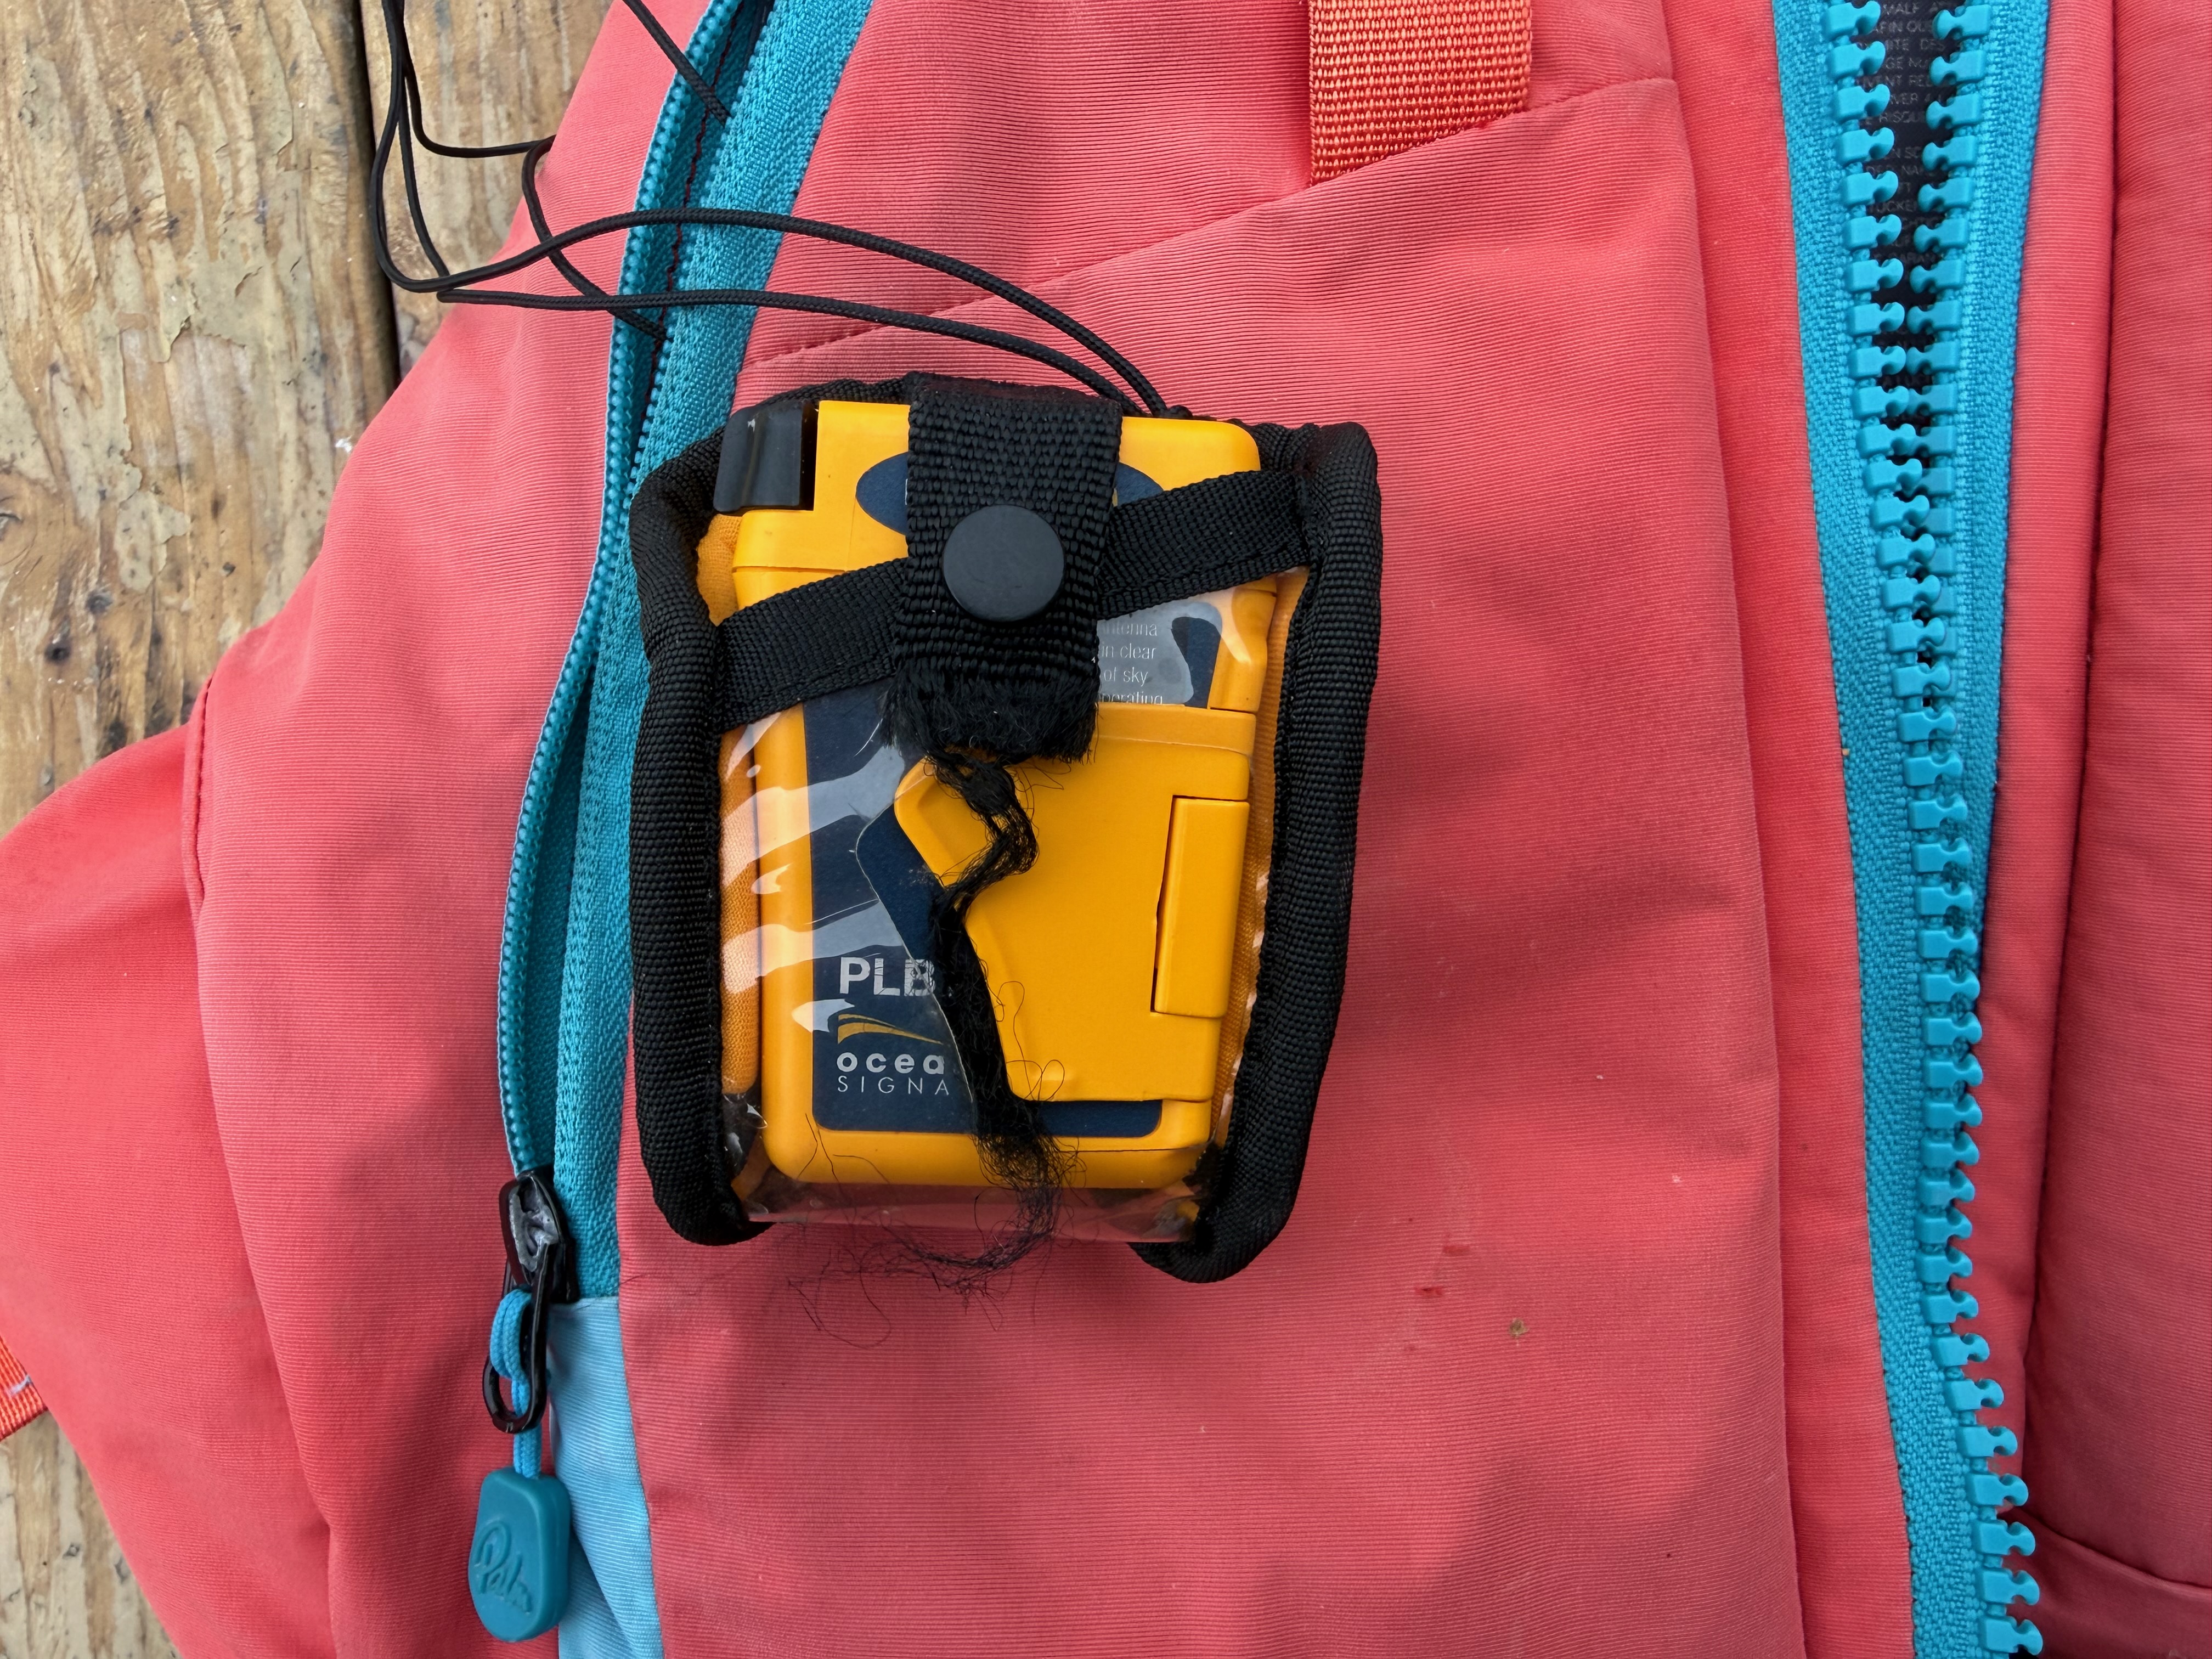
I bought mine back in 2019, when I first got seriously into sea kayaking. It came before the VHF radio or LED flares, on the basis that it was the most versatile way to get help when you really need it. I’ve carried it tethered to my buoyancy aid while kayaking and in the lid of my rucksack for hill walking ever since. I’ve never had to use it. Yet.
PLB1 in the pocket of my Palm Peyto buoyancy aid. There’s a small eyelet inside the pocket which I thread the lanyard through to avoid losing it.
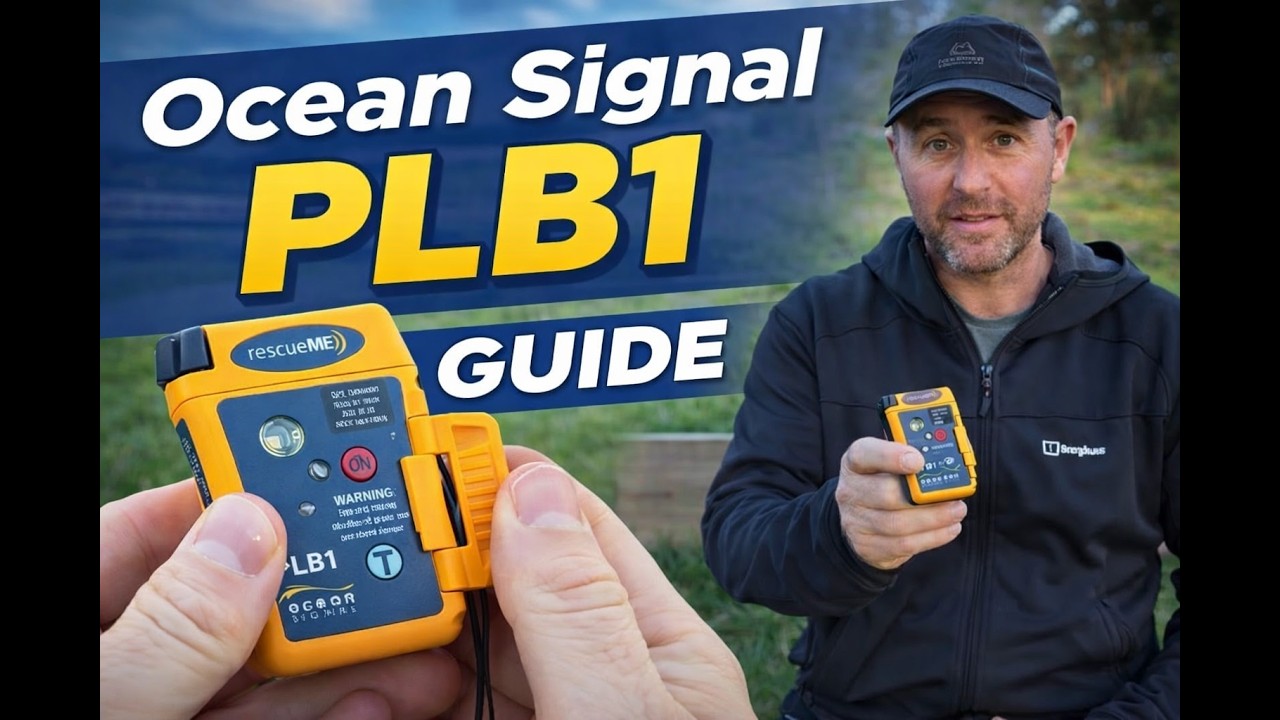
The PLB1 is a UK made, small, purpose-built device. As the name suggests, it’s ‘personal’ – not for attaching to a vessel or aircraft, you need it on you. It is also not for two-way communication, sending locations to your family, getting advice or checking the weather forecast. It has one job only – getting help in an emergency. No screen, just two buttons – TEST and ON. It fits easily in the palm of my hand (77 x 51 x 32.5mm weight 116g).
My PLB1 – Test and On buttons shown, LED indicator and white rescue strobe at the top.
You do need to register your device (for free) via this government website. I’ve just been prompted to re-do and update mine, it took 10-15 minutes. You will need the beacon’s Hex ID or Unique Identifying Number, the manufacturer serial number and model (all stamped on the device), your contact details, and a trusted person or persons who can explain what you’re probably up to. And who are probably not with you and in the same trouble! This step is essential for the rescuers: they need to know whether to look for a kayak, gyrocopter or hiker, and to check whether an alert is genuine.
A short demo of my PLB1 including extending and rewinding the aerial.
Should you press the ON button, it waits 50 seconds and then sends a 406 MHz radio signal into space. A satellite receives the signal and alerts a ground station. A professional assessment is then made as to what kind of help is required based on where the signal is coming from i.e. land, water, mountains etc and the registration details you gave. The most appropriate emergency services are informed i.e. coastguard / mountain rescue / police.
If it can lock onto GPS, it will send your location (accurate to within 100m). Even if it cannot get a GPS fix, the satellites can locate you to within 5 nautical miles by radio alone. Once active, it sends out a 121.5 MHz homing transmission which rescuers can lock onto. It also has a small, white LED strobe to attract attention. It will keep transmitting for over 24 hours if the battery is in good order, potentially less if it has been used. The 50 second delay is to give you time to cancel if you have made an accidental activation.
How to use it:
Pull out the antenna until it will go no further
Point the antenna vertically
Open the safety flap
Press the on button for approximately one second until the Green LED flashes.
The LEDs will then flash periodically to confirm transmission and GPS status.
There is a radio test feature which you are encouraged to do monthly and a more power intensive GPS test to perform annually. They ask that you only do this in the first 5 minutes of every hour as courtesy to aircraft (it transmits a short burst on 121.5 MHz, see instructions for details).
False alarms, deactivation:
It’s quite hard to set it off by accident because there is a hinged plastic flap covering the buttons. If you need to turn it off either because you’ve been rescued or because you’ve set it off in error, just press the ON button for one second until the red light flashes twice. Release, wind the aerial back in and call the UK Coast Guard.
It’s not designed to work in or under water (it’s waterproof to 15m, it just won’t reliably transmit). You will need to hold it up out of the water if you are floating.
You don’t receive any confirmation that help is on the way or even that your message was received, it’s purely one way.
There is no way to specify the kind of emergency – could be an important factor if you’re at risk of danger from other humans vs medical / sporting accidents.
The built in battery has to be professionally replaced every 7 years, the expiry date is printed on the case and there are various service centres around the UK.
Satellite enabled smart phones and watches
Since I got this device, mobile phones and even smart watches have developed satellite connectivity. I’ve given some serious thought to whether I still need to carry my PLB1. For me personally, I definitely still do, though I think for a lot of people, the watch / phone uplink would be sufficient for peace of mind. Provided you can get an unobstructed view of the sky, it’s not wet and you have sufficient battery remaining, a consumer device could solve the problem. If you’re on the fence about that then definitely read this page on Ocean Signal’s website PLB1 vs iPhone Emergency SOS: Which Device Should You Really Trust When There’s No Cell Coverage
As they say, phones are more likely to be lost or damaged in whatever catastrophe led to the problem, their batteries are fickle, they don’t work all over the world, they don’t like wet hands, they don’t have a homing transmission for the helicopter, they won’t keep transmitting for 24 hours and you usually need to tap or type to make your request. On the plus side, there is two-way communication and you’ve probably already got it for free (though Apple did hint at a service fee after the first 2 years).
I daresay consumer satellite tech will save a far greater number of lives due to sheer numbers of devices out there. They are undoubtedly a great idea. In many situations I would try my watch or phone first because they provide two-way communication. Nevertheless, I am certain they are not a complete replacement for the PLB1 in my use case.
My flotation device and essential safety kit
Have things moved on in 7 years?
Having had my PLB1 a while, I looked online to see what alternatives there are now. Garmin make a small device that has some amazing two-way features but it does require a monthly subscription to use. There are one or two other similar small PLBs for example, the ACR ResQLink 400 and McMurdo FastFind 220. These appear to offer similar capabilities to the PLB1.
Conclusion
This device is a permanent fixture in my risk assessments for my trips and adventures. I have had some amazing experiences and made memories that will last a lifetime because of the confidence it has given me. If I ever find myself separated from my kayak floating in the sea or taking a tumble off Striding Edge, it will be the very best money I ever spent. If mine was lost or broken it would be replaced immediately without question.
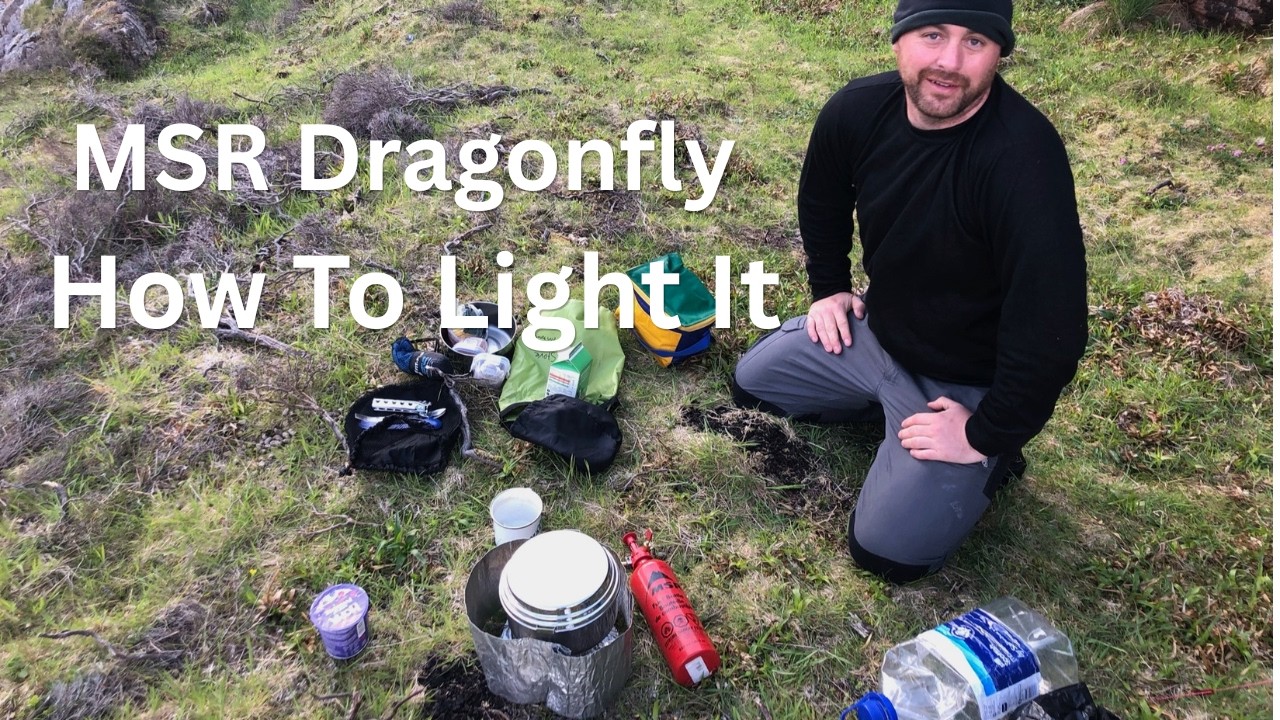
I’ve been cooking on this stove since May 2020, and in that time it’s been with me on some of the best trips of my life- a three-day circumnavigation of Raasay and Rona off the Scottish mainland, island hopping around Arisaig and a full circumnavigation of the Isle of Bute. Days regularly running to 40 kilometres of paddling, wild camps on rock ledges and beaches, thunderstorms, swell, wind, and on the Summer Isles in July 2025 the most catastrophically bad midges I have ever encountered in my life. Through all of it, the Dragonfly performed.
That’s the review, really. But here’s the detail.
Why Liquid Fuel?
The Dragonfly runs on white gas, kerosene, diesel, and petrol. That flexibility is the whole argument for it. I have petrol around constantly for the lawn mower, the chainsaw, general land maintenance. Being able to top up the stove bottle from the same stock I’m already running is genuinely convenient in a way that’s hard to overstate.
It’s also good to know you can easily get more cooking fuel wherever you are in the World.
Gas canister stoves work fine. But unless you’re doing a single day trip, you always need a spare and I know myself well enough to know I’d resent the constant purchasing. With petrol, there’s no calculating how much gas is left in a canister, no anxious rattling at camp. You look in the bottle and you know.
If you’re an occasional user going out a few times a year, a gas stove is probably the better choice. Simpler, lighter, no technique required. The Dragonfly needs a lot more practice and commitment to use happily.
What It Does Well
It’s powerful. When it’s running properly, it sounds like a small jet engine. Water boils fast, which after a long day on the water matters more than you’d think.
It’s robust. Five years of being stuffed into dry bags and kayak hatches, and it hasn’t missed a beat.
It’s economical. Petrol is cheap. No fuel goes to waste at the end of a trip – whatever’s left in the bottle goes straight into the car or the mower.
It’s adjustable. The Dragonfly gives you genuine flame control. This is useful – you can maintain just enough heat to keep your boil in the bag products at temperature without boiling over. It also comes in very handy if you are frying.
It’s genuinely good fun to use. There’s a ritual to it. Once you’ve got the technique down, lighting it feels satisfying. It feels a bit dangerous, there’s every chance of singeing your eyebrows each time you light it if you are not careful.
The Honest Downsides
Petrol is flammable and it smells. If something goes wrong with containment especially in a kayak hatch or rucksack, it can contaminate kit in a way that gas never would. I keep it in a dedicated dry bag and have never had a problem, but it requires thought.
There’s more to go wrong than a simple gas stove. More components, more maintenance. And the technique takes practice. The first few times you light one, it’s not intuitive.
Premium petrol is worth using. I believe the better detergent additives make a real difference to how cleanly it burns, and fresh petrol works noticeably better than old stock. I believe MSR would prefer you to use dedicated stove fuel for optimum longevity but as I say, I’m in year 6 of mine with no issues.
If you want the lightest possible kit, this is probably not for you – a small gas stove would take up less space and weigh less. This is not so much of concern for my kayaking trips.
How to Use It — The Technique
Turn the dragonfly stove body upside down and shake it for sixty seconds before use. There’s a small pin inside the jet that bounces around and clears carbon deposits. Shake again after use for the same reason.
Pump approximately 20 – 30 times to pressurise the bottle.
Release a tablespoon of petrol into the small dish beneath the burner, then close the valve. Light the petrol in the dish and let it burn for around 60 seconds — this heats the metal of the jet, which is what allows the fuel to vaporise properly. Then slowly reintroduce flow. Not too much. Let it catch. When the flame shifts from yellow-orange to blue, it’s running correctly. Give it full flow and let it go.
Give the bottle an occasional pump while cooking to maintain pressure.
When you’re done, turn off at the bottle rather than at the stove. This lets the fuel line dry out, which reduces drips and smell.
I don’t generally go on kayak expeditions by myself and my friend Nick has exactly the same stove. That means that if one of us breaks a pump or similar we’ve automatically got spare parts and spare fuel. If I was going solo much I’d perhaps be tempted to get something simpler.
The Verdict
The MSR Dragonfly suits a particular kind of person doing a particular kind of trip. If you’re spending multiple days out, you’re already carrying petrol, and you’re willing to learn the technique — it’s an excellent piece of kit. Reliable, powerful, and satisfying to use. It’s been on every meaningful trip I’ve done in the last five years, and I’ve never once wished I’d brought something else.
We try to keep two weeks free every summer and see what the weather allows.
Some years the forecast is perfect and we do something ambitious like circumnavigating Raasay and Rona. Other years the Atlantic does what the Atlantic usually does and we cancel the leave and go back to work.
This trip sat somewhere in between.
Scotland was clearly off the table, but there was a narrow 24-hour window of settled weather locally and, crucially, the tides lined up. That was enough to tempt us out. The plan became a quick crossing to Piel Island.
Unfortunately, that would have required driving to Barrow-in-Furness.
Neither of us could quite summon the enthusiasm for a one-hour 50-minute drive when the sea was already visible from my house, so we decided instead to paddle across from Silecroft in West Cumbria.
High tide was 06:51.
Low tide at the mouth of the Duddon would arrive at 13:30.
We needed to be well clear of the estuary before then.
We left Nick’s car in the parish council car park at Silecroft at about 08:30, packing just enough food and beer for 24 hours.
The car park signage suggested the parish council preferred people not to stay overnight. We had intended to let them know what we were doing, but the contact number I had for them no longer worked.
We decided to risk it.
The sea was grey and slightly lumpy. It felt much cooler than July ought to, but it was good paddling. Through breaks in the cloud, the southern fells appeared almost unreal – ridges fading in and out of mist.
Within half an hour, we were clear of Haverigg and committed to the crossing. A group of seals seemed to find us quite interesting from a discreet distance. They were bigger than the ones we are used to seeing in Scotland.
I’m not sure why, but you can tell when you’re kayaking over shallow water; the boat just feels different, slower, more resistive to paddling. We were half a mile or more from land, but ran out of water due to a 30-40m wide sand bar with no visible ends.
Mindful of the falling tide, we decided to get out and drag ourselves over it on foot rather than try to go around it and risk being beached.
Once back afloat, we could very clearly now see the top of Walney Island. Our plan was to head down the Western/seaward side of it.
We stopped for lunch at Walney Island Beach, near West Shore Road. It was nearly low tide, so we pulled the kayaks clear and walked 200m or so to a slipway where we heated up some boil-in-the-bag. I went for an all-day breakfast. I have such a love-hate relationship with these things; I definitely thoroughly hate them by the end of a trip. The first one is always surprisingly less disgusting than I remembered, but by the second, I realise I was right all along. This one wasn’t too bad; I appreciated a hot meal under the circumstances.
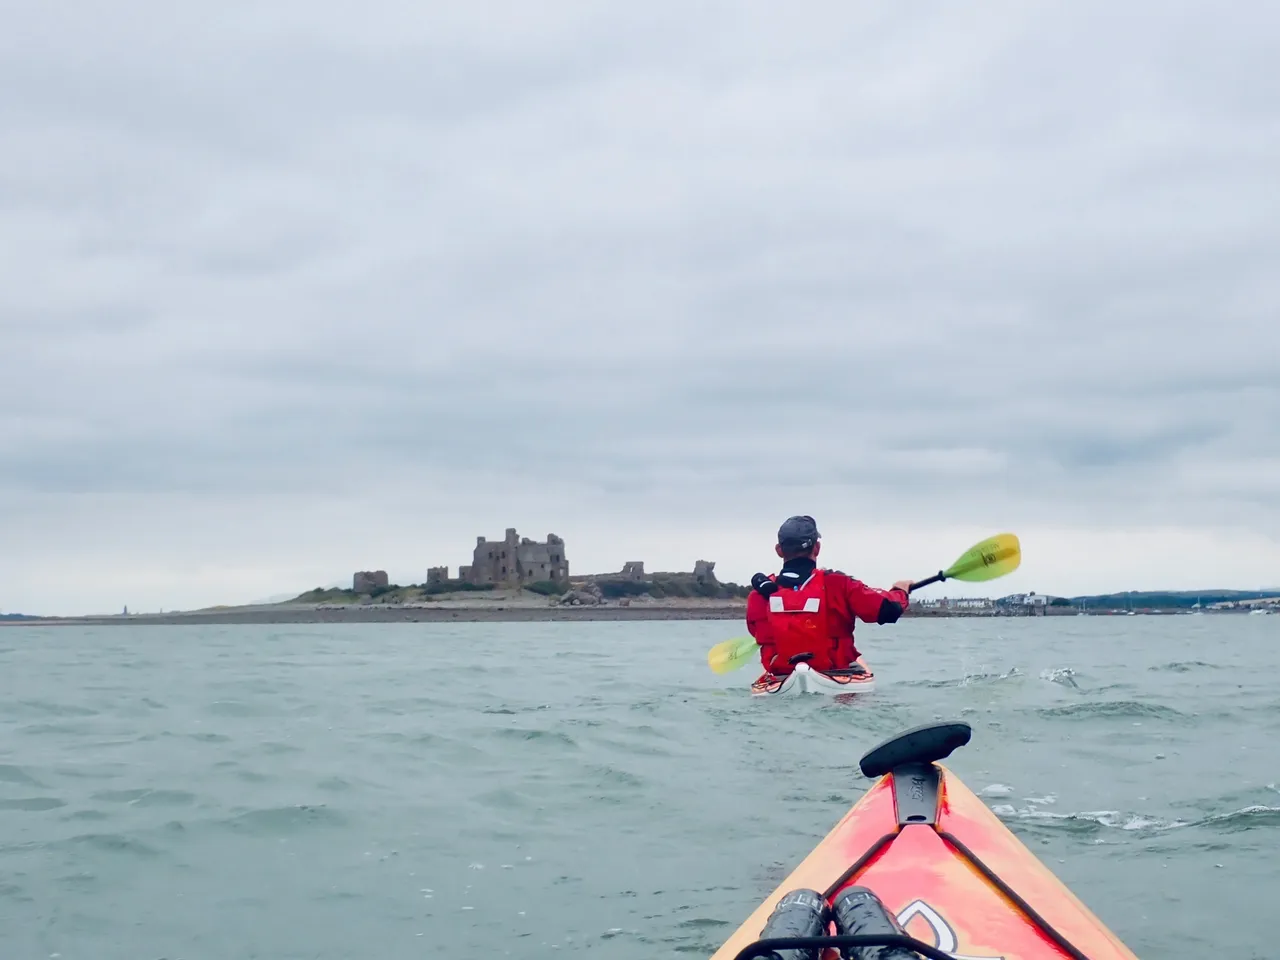
It didn’t take us too long to reach the bottom of the island; we turned left and were treated to our first glimpse of Piel Castle. It looked incongruous, a ghost from the past. The castle still dominated the island, even as a ruin.
We landed by the ferry slip. Steps led up to the Ship Inn. The landlord of the Inn is also, officially, the King of Piel. So, we found the King, a friendly man in his 30s not long crowned and busy behind the bar. A loud, well-oiled customer was trying to hold court with some story or another, clutching the counter with one hand. There were half a dozen or so other customers, all desperately avoiding any eye contact with him. Everyone looked around as we walked in; dressed as we were in rubber trousers, cagoules, and buoyancy aids, we were definitely a welcome diversion.
I asked the King if we could camp on his island.
“Anywhere you like” was his easy reply. £5 per night, an exceptional bargain.
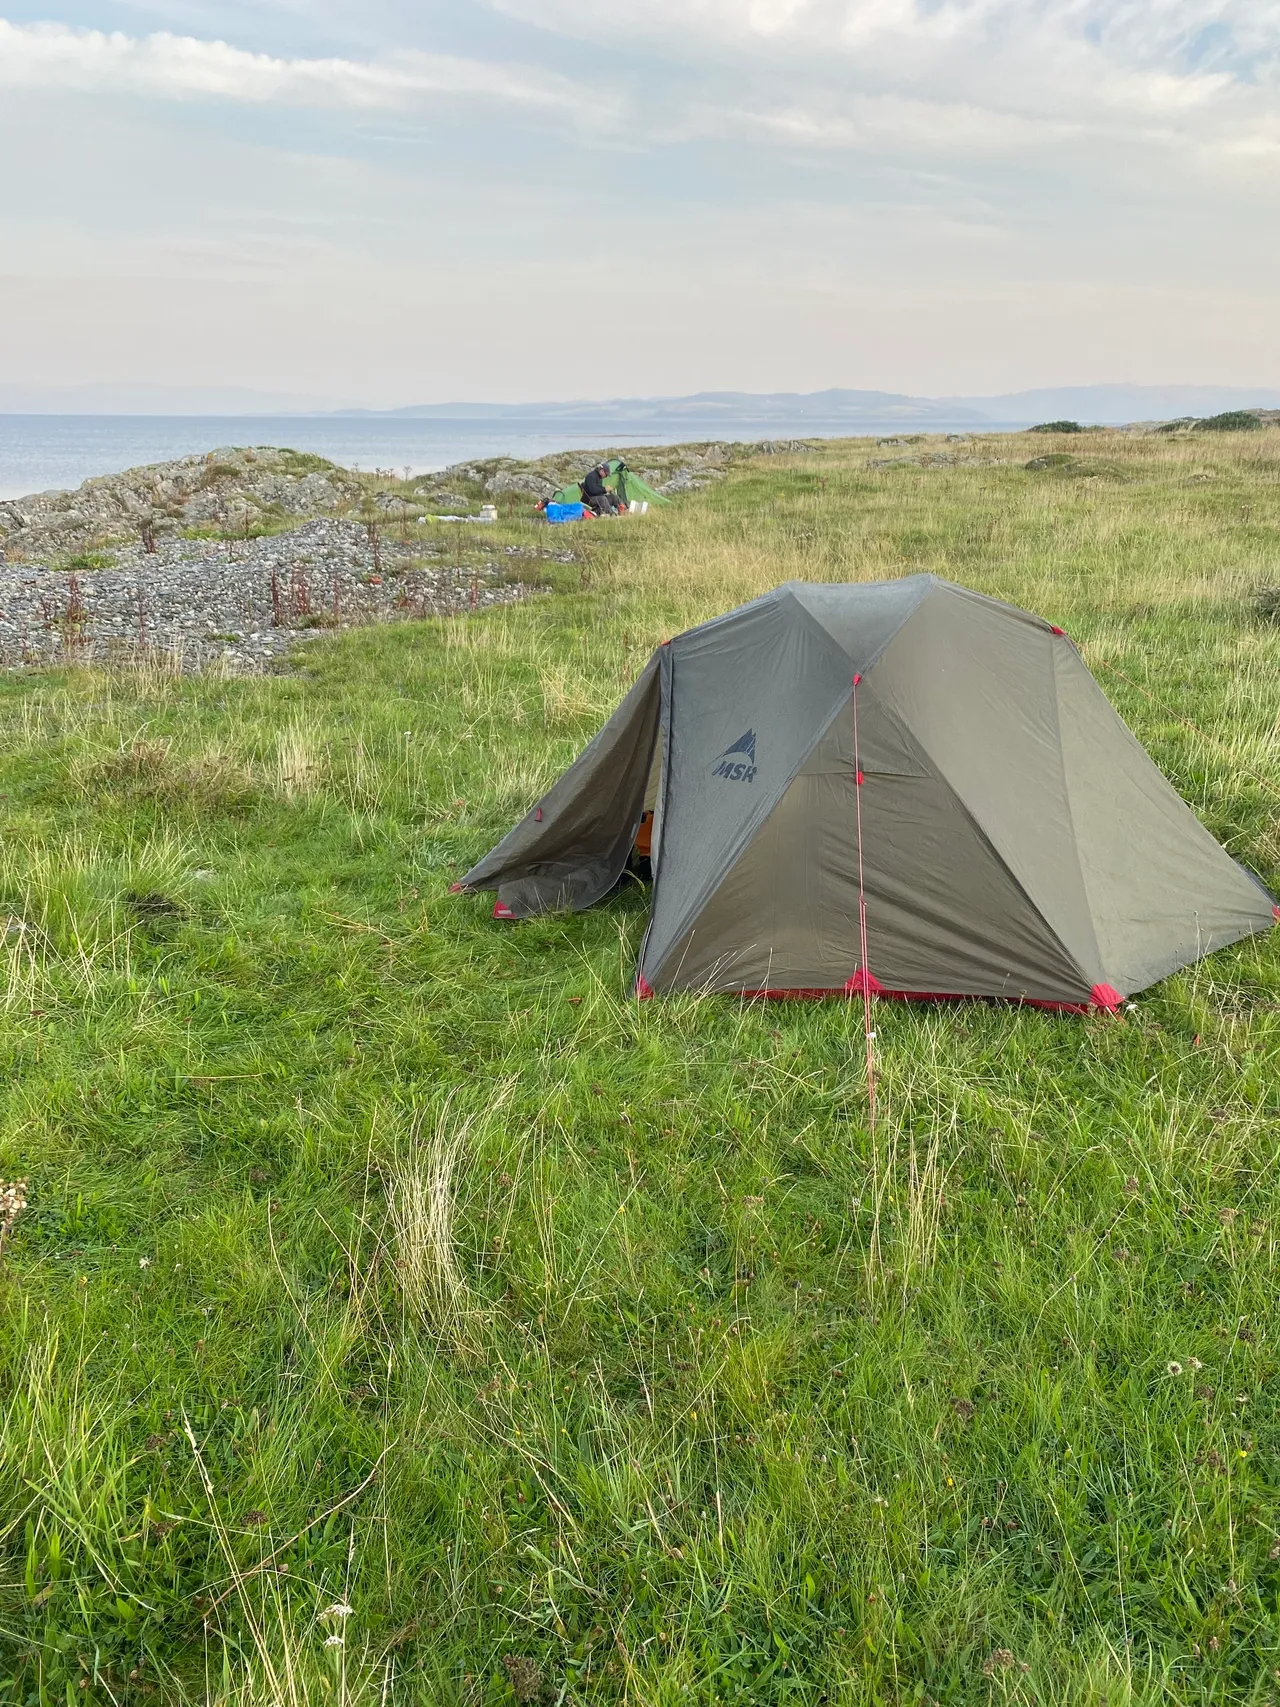
Everywhere around the pub was already fairly chock-a-block with tents, so we got back into the kayaks and paddled 400m or so around the coast, settling on a flat, grassy strip not far from some of the houses.
Once the tents were up, we found the castle – note the opening hours “Any reasonable time”. The King joined us with his dogs briefly; without saying it, he clearly needed a little bit of time away from the bar.
We dined on dehydrated Chicken Tikka Masala and then adjourned to the bar.
We found a side room full of nautical curiosities and photos and made ourselves at home. Several pints later, long after it had got dark, a private number called Nick’s telephone. It was Cumbria Police – the parish council car park committee at Silecroft had seen us paddle away over the horizon and were worried as our car was still there. This had caused a terribly embarrassing sequence of events – Bedfordshire police going to Nick’s home address, getting contact details from his wife, passing them to Cumbria police. We made our apologies to the police and thanked them for their concern.
We had a very early start the next day; high tide was 08:00, we needed to be well clear of Duddon Estuary on the way back. I needn’t have set an alarm because at 5 a.m. a dredger passed seemingly a few feet from our tents, making a noise like a surprised cow.
We had filled our flasks with boiling water the night before to save time, so breakfast was a perfunctory porridge and tea before we got back on the water.
We reached BAE Systems (where they make nuclear submarines). A massive contrast to be amongst such a futuristic estate only a short paddle from a 14th-century castle with its own reigning King.
Under the road bridge and by the time we hit the estuary, the wind was picking up considerably. The waves were coming in at between 45 and 90 degrees, and they were breaking into surf as they got closer to the land. Surf is a problem for kayakers; there’s not a lot you can do if a wave breaks over the side of your boat. It would mean a certain capsize, potentially loss of kit, injury, and a cold dunking. We deliberately took a path further out to sea, balancing the risk of being unable to swim for shore vs hopefully not needing to.
It was probably just slightly the wrong side of enjoyable at times. Loaded boats tend to be better to handle in these conditions, and thankfully, we had a considerable cargo of un-drunk beer thanks to the pub being open.
We’re pretty good at keeping each other’s spirits up and soldiering on. We only stopped once, for a quick brew from a flask because the conditions were set to deteriorate further.
I was starting to think about landing and carrying the boats to the nearest road, but it didn’t quite come to that as Silecroft grew from a dot on the horizon to the very welcome sight of Nick’s parked car. With an angry-looking lady standing next to it, hands on hips. It was going to be telling-off time.
“I know exactly where you’ve been.”
We must have looked fairly sheepish; her expression softened a little. All the same, she had definitely been looking forward to this moment and was not going to be easily deprived of it. We had a chat for about five minutes, explaining we were just local guys out for some harmless adventures. I made a genuine apology, and with that, and a suitable contribution to the car park honesty box, we were on our way home for fish and chips.
I needed a good-quality, lightweight, tough tent that would be small enough to fit into a dry bag and then into the front hatch of my sea kayak. I wasn’t planning to use it for backpacking, so I felt able to treat myself to a two-person tent even though I was only planning to use it on my own.
I looked at a few different options, but I was already a fan of MSR kit and the Elixir 2 had some great reviews. The price was in the Goldilocks zone and I felt confident choosing it.
I’ve been delighted with it. I must have now used it on about ten different multi-day trips, each of which has involved taking it up and putting it down again every single day.
It’s very easy to work with. I normally lay the separate groundsheet out first and peg the four corners. Next, I lay the inner tent over the groundsheet and add the four corner loops to the existing pegs. Then I put the poles together and, following the colour coding, place them into the corner tabs.
Next, I clip the inner tent onto the poles, add the cross-brace pole across the top, and then it’s simply a case of laying the fly sheet over and pegging out the guy ropes.
I’d say I can put it up from scratch in under five minutes.
If you need to put it up in the rain, just do the groundsheet, then the poles, then the fly sheet — that way the inner stays dry.
In all the times I’ve used it, I’ve only had one pole break. In all honesty, it was probably my own fault — I suspect I didn’t fully engage it before putting it under tension. MSR were ever so good to me: they sent me three spare pole segments by post, free of charge, and included instructions on how to fit them. I’ve still got two spares now; it’s never happened again.
Pros
Lightweight – 2.2 kg (including poles and fly)
Spacious – plenty of room for two people, or one person and a lot of kit
Weatherproof – has handled high winds and rain, completely bomb-proof and dry every time
Tough – well-made; the extra groundsheet means you can pitch on rough ground or beaches without worrying
Excellent customer service – genuinely helpful and responsive
Cons
Packs slightly larger than some ultralight tents, but that’s irrelevant in a kayak
The supplied pegs are light but not very strong — I replaced mine with sturdier ones for the guy ropes
Vestibule space is fine for storage but not ideal for cooking
Overall, I love this tent and I look forward to using it. I never worry about whether it will look after me or not — I have full confidence in it.
If you’d like to see more about it or buy one, here’s my Amazon link.
Here are the MSR Groundhog tent pegs that I added to my tent bag Amazon link.
I note there is an updated version of the Elixir 2, priced a little higher but looks fantastic – here is the link
As an Amazon Associate, I earn from qualifying purchases.
I buy all my own gear and write independent reviews. If you found this helpful,buy me a coffee.
Thanks for reading. If you enjoyed this review or spot anything that needs correcting, I’d love to hear from you — just use the comments box below.
We arrived at Bardentarbet Pier just after midnight. I pitched my tent behind the car. Nick slept at the wheel with the seat back. By 5am it was light and the midges had already decided to choose violence. They attacked my face the instant I unzipped my tent.
Chunky, rough cobbles covered the beach between the road and the sea. Unfortunately, we put the boats down in the diluted liquor that was oozing out of a bloated, dead sheep. We hastily sidestepped onto clean ground.
We took it in turns to take the car a mile back the way we had come for a final porcelain poo.
As we shuttled back and forth from the car to the boats, I found a pair of Nikon binoculars in a see-through Lomo dry bag. They were compact, weighty and of very high quality with a metal body and glass lenses. They had been carefully sealed in the bag. Surely only another kayaker would have dropped them there. I stowed them safely out of sight in the car planning to try and trace the owner at a later date.
We paddled off, aiming directly for Tanera More. I’d read about it already; it was said to be privately owned and protected by security guards. We took a look at the settlement without getting too close, continuing clockwise.
A shiny-looking Land Rover Defender appeared to keep us in sight as we rounded the corner. We avoided that and found a nice secluded midge free beach where we could brew up and have our breakfast.
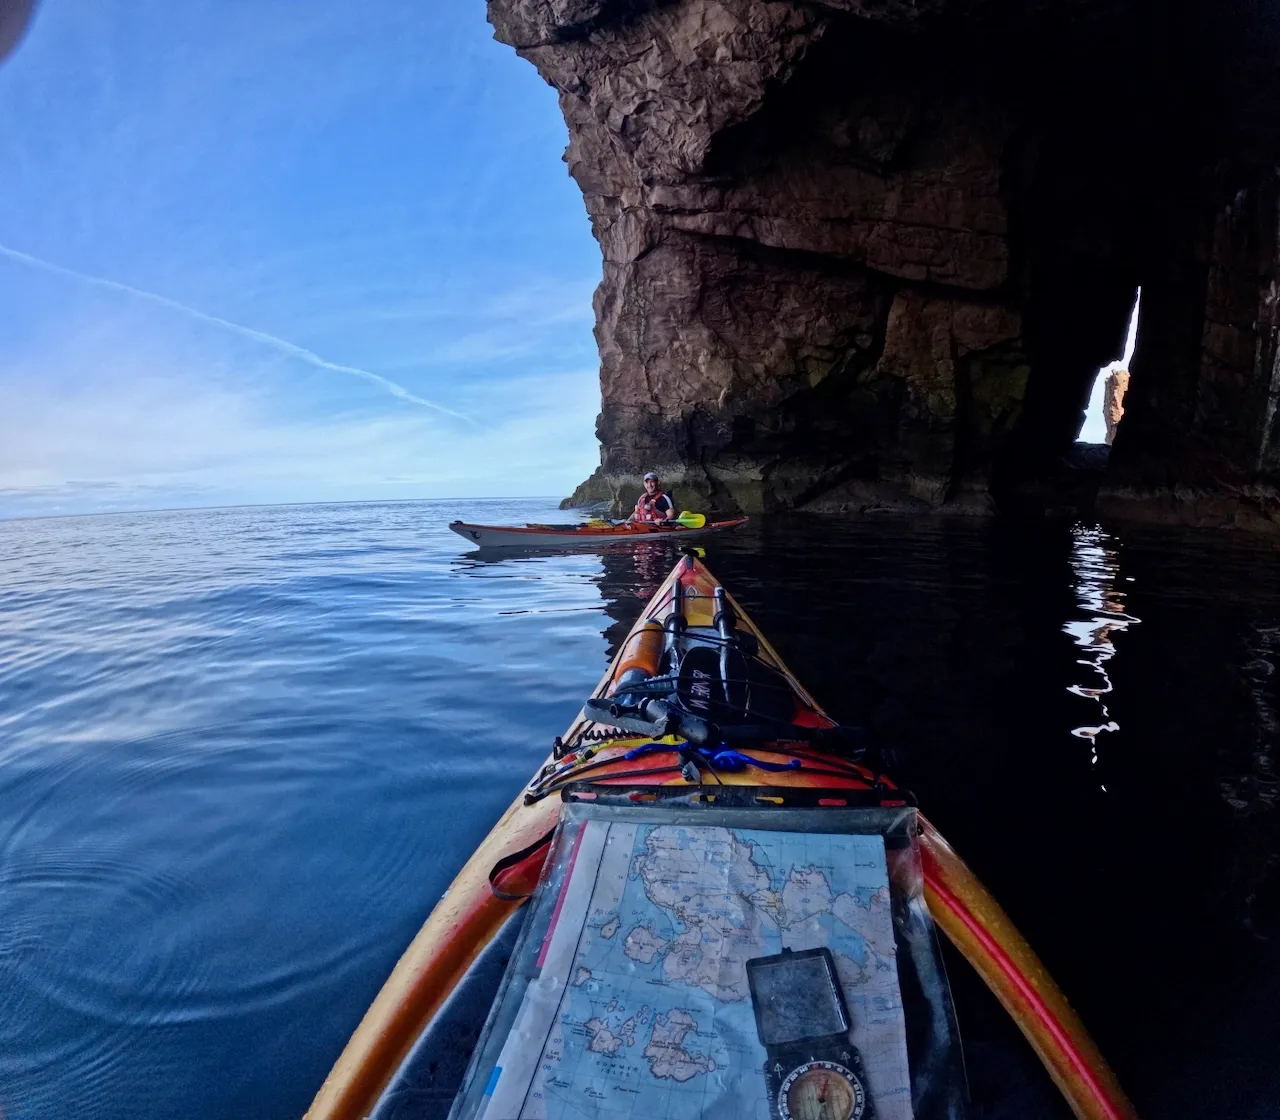
We paddled about 30km circling the islands, paddling into caves and getting a feel for the area. Two or three dolphins breached nearby. It was pretty well flat calm with sunshine all day, we had been very lucky.
At just after 4, we settled for a scrappy, rough campsite on west side of the uninhabited island Tanera Beg. We had a dodgy carry-over of more slippery cobbles to get the boats clear of the high tide mark. What had looked like flat, green grass was actually six inches or so of undergrowth, gorse and heather. It was flattish. There was plenty of driftwood though and no “neighbours” to offend.
We’ve executed this drill many times now, so we were all set with tents pitched and settled in within 45 minutes.
Personal admin is of critical importance on these trips. We stripped off to our undercrackers and wobbled our way back into the sea. I’ve got some travel soap that seems to be ok with salt water. I used my microfibre travel towel to dry off, a blast of Lynx and I was ready for my clean, dry clothes.
Nick is the designated firestarter but I helped gather a respectable pile of washed-up fence posts, pallets, branches and twigs. Dinner for me was an Uncle Ben’s rice and tinned salmon followed by a nice cup of tea and a chocolate bar. Nick’s more of a boil-in-the-bag man.
The next bit is my favourite.
Lighting the fire and pitching into some tins of beer. Guinness or Adnams Ghost Ship for me, Shipyard for Nick. I don’t know how many, definitely too many. Beer, fire, shooting stars, satellites, pretty amazing to think the closest other humans were several miles away and separated by water.
We had a fair night’s sleep and awoke to a midgey breakfast, porridge for me, boil in the bag all-day breakfast for Nick. Nice cups of tea.
If you’re eating, sleeping, and bathing in the wild, you’ve also got to have your daily Richard III wherever you may be when the need arises. I used to worry about that, but these days it’s no issue at all. I take a little orange trowel down to where the sea meets the sand, dig myself a hole about six inches deep. Ideally, just in front of a rock or something I can brace my back against. Trousers and pants off, bombs away, bury it, and then waddle into the sea. Once you’ve wiped your arse with wet, soft seaweed, you won’t look back. It’s very nice. Very kind on the anatomy. A quick sluice of seawater, a spot of soap, and jobs a goodun. You don’t want to cut corners with these drills, the last thing you want is nappy rash.
Welcome back if you skipped the last paragraph.
We got underway. Heading south east towards Horse Island. On the way, Nick, with his eagle eyes, saw dolphins breaching about one kilometre away. I don’t tend to notice these things as I’m a) short-sighted and b) map reading.
We wouldn’t dream of disturbing wildlife, but as it was, we were headed that way.
Twenty minutes later, we met the dolphins. There were about 25 of them, arcing out of the water in twos and threes, playing, enjoying their athleticism. For fifteen minutes they crashed in and out of the sea, sometimes as close as ten feet from me. I have rarely felt quite so alive. I could smell them. I was being lightly splashed as they re-entered the water. They created a wall of sound with their snorting, breathing and smashing into the sea. I held my underwater camera beneath the hull, hoping to capture it.
We both managed a bit of film which I have edited together here.
As we ate our lunch, the coastguard transmitted a missing person bulletin on VHF channel 16. A lady, in her sixties, on her own, out in a kayak, not too far from us and overdue back to her family. We know each other from our time in the police, so we both mentally switched on. When we peered into the distance, we saw a sea kayak slowly heading our way with a grey-haired paddler. Surely not!
The paddler had seen us; at 30m, we realised it was a man, not the missing person then. He stopped for a chat. Straightaway, he was two leagues better than us. His composite sea kayak was well used, patched in places but of top-notch quality. His gear was high spec, slightly sun-bleached. He had a dry suit, we were in t-shirts. He was about 70. We made him a cup of tea and swapped war stories of kayaking trips past. He was humble, a soft East of Scotland accent, clearly a highly accomplished paddler.
He very politely and diplomatically put it to us that we were a bit risk-averse and challenged us to up our paddling game. This was a breath of fresh air as most people we meet tell us we’re going to die!
He showed us some of his kit, I noticed he had a medium sized plastic bottle with the bottom cut away just in front of his seat. I’d had to make myself one of those once when I needed to empty my bladder, but we didn’t comment on it. He proudly showed us a pool noodle that he had modified as an aid to self rescue in the event of a capsize.
As an aside, I mentioned the binoculars we’d found. His smiling face broke into a beam, he explained that his was the car next to ours back at the pier. He had set off a couple of days before us. He had lost his binoculars but did not know where and had been emptying his kayak and retracing his steps totally unaware that they were left on the beach where he had set off. He described them to me, this was unnecessary as I was already totally convinced he was a genuine person. I took a note of his address and asked for his phone number so I could confirm he would be around, these were valuable and would need special postage. I found it quite charming that he did not know his number and his phone was safely powered off inside a dry bag in the depths of one of his hatches as he got it out and looked it up for me.
Mr W told us the best place to camp. He went north, and we carried on south to the beach he recommended.
This was a proper, perfect campsite. Actual flat grass, sandy beach, bountiful firewood, and even a fireplace. Just before we turned our radios off for the night, we heard with relief that the missing lady kayaker had returned in one piece.
As the tide fell, Nick noticed the remains of some wood structures and rocks that we surmised were to hold fishing nets to sieve the small bay’s catch from the retreating sea. We thought about those who had gone before, sat around a fire on the exact same spot as us, bellies full of fresh fish.
When the sun settled, the midges came out. These were the worst midges I’ve ever experienced in my 46 years.
I’ve spent a lot of time in Scotland. This was the midge apocalypse. Words cannot convey how serious this was. It was not a case of the air being thick with them. The air was them. Every inhale sucked hundreds of them into my throat and lungs causing sharp coughs. They filled my ears with tiny, whizzing screeches. My eyes itched and wept involuntarily. We both had mosquito nets, but it was unbearably humid and unpleasant underneath them. My snood was literally a lifesaver. I used it to cover my ears and mouth, I think I would have gone insane otherwise.
We both had to abandon our beers and head into our tents. It was that bad.
Overnight, my eyes started discharging sticky pus. My eyelid muscles were not powerful enough to open, so I had to manually pry them apart with my fingers whenever I needed to see anything.
Things were not much better the next day, so we packed up and fled into our boats. Midges never seem to follow us more than 20 ft or so out into the sea.
We headed back north, taking a meandering route around the northern summer isles. More arches, caves, and dolphins.
We discovered a cow-sized dead animal floating in a little cove. Probably a whale. The sea was getting lively, so we pressed on for the commercial campsite at Altandhu.
All the other campers had gravitated towards the upper pitches, near the road. We were the only ones to arrive by boat, so we had the lower beachside terrace to ourselves. We paid the man and luxuriated in lovely hot showers.
The pub next door (Fuaran Bar) was busy. They were serving food but told us there were no tables. But there was room in the bar. And they were doing takeaways. So we had takeaway fish and chips at a table in the bar. And many, many pints.
The last day was easy, a 6km paddle back to the car and home.
When I got home, I sent a text to Mr W and he gave me his address. I carefully wrapped his binoculars in bubble wrap and put them in an old amazon box, they were sent special delivery. He sent a very gracious thank you, his offer to pay for the postage was declined and we both said we would meet up if we’re ever in each other’s neck of the woods.
When I think back on this trip – the dolphins, the apocalypse midges, the perfect campsite – what stands out is Mr W. We only spent an hour with him, but his influence was lasting. He challenged us to be bolder. He shared his best campsite. He showed us a little into our future being decades older than us and still in the midst of our shared hobby. And somehow, through pure chance, we were able to return something valuable he’d lost. That felt right.
After 5 years of hard use I still rate this tool very highly
I’ve only broken one minor part – the spectacles tool and I got a replacement bit for £5 or so
Though you can get cheaper, you probably will not get better, it’s beautifully designed, a pleasure to own and use
Be aware not necessarily legal to carry in the UK
Situation – Why I Needed a Leatherman
I am one of those people who is constantly fixing, adjusting and generally fiddling with things. A lot of the time I am working away from my regular tools, having a Leatherman Wave+ with 18 different tools in my pocket is always useful.
When I bought it 5 years back, I had no idea how practical and durable it would be. If I lost it, I’d be ordering another one immediately.
Specification
The Leatherman Wave+ is the company’s best-selling multi-tool. It has 18 different functions, can be operated one handed and everything apart from the pliers locks into place (more on that later).
It is a masterpiece of design. It is pleasant to handle. I have to stop myself opening and closing it because it feels really good when you do.
Main features include:
• Long nosed pliers with wire strippers, cutters and a semi-circular serrated cut out for gripping and turning larger objects.
• Conventional cutting blade (7.42 cm) and a serrated blade for rope, webbing, seat belts etc (this is the most useful tool IMHO)
• Large flat bladed screwdriver suitable for prying open tins of paint etc.
• Nail scissors – good for cutting paper and thin materials. Can operate one handed
• Multi use file – diamond carbide on one side and rough metal on the other. Good for sharpening other tools / blades in the field.
• Wood saw blade- only little, good for pruning small branches or cutting through something of approximately finger thickness.
• Adaptable Posidrive or flat bladed screwdriver – take the tip out, turn it around plus you can get an accessory set to widen its scope
• Spectacles screwdriver (easily snapped, cheap to replace though)
• Ruler in centimetres and inches – max 8 inches
• Can and bottle opener. The can opener is very good to use – check my video out above.
Optional bit set
Mine came with a webbing sheath, but I chose to get the leather belt sheath instead. I now use the original sheath for the bit kit set.
My Verdict After Five Years of Daily Use
I still carry my Wave+ with me most of the time around the house and garden. I feel a bit naked without it. It is a fantastic bit of kit capable of helping me with an infinite array of problems.
It has been on all of my sea kayaking trips, usually sitting in a dry bag at the bottom of the kayak. It has been used to fix camping equipment and boats, cut rope, saw branches for firewood, remove a tick from my calf, cut up food, open tins and cut wires.
Around the house and in the field it has helped me with everything from wiring a plug to, just today, fixing a rotating cake stand for my wife.
I use the serrated knife most often for opening delivery boxes and cutting rope. Next most useful are the screwdrivers, then the pliers. I have hardly ever used the conventional knife blade, and the only time I tried to use the spectacles screwdriver for a bit of gentle prying it broke.
My Wave+ has developed a touch of orange rust around the joints. That will be my own fault for using it near the coast. It will come good again with a wipe from an oily rag.
Mine has had a hard life and it is still in great condition. I was able to get a new spectacles screwdriver blade for only a few quid.
Be Careful – Not Automatically Legal to Carry in the UK
You cannot carry any locking knife in a public place without a good reason.
Because each blade on the Wave+ locks into place, you need to take care with this. There are plenty of perfectly good and respectable reasons to carry one. Just make sure you have thought about it, as the penalties can be quite severe.
Verdict
Five years on, my Leatherman Wave+ has earned its place as one of my most trusted tools. It is solid, clever and endlessly useful, the sort of thing that quietly makes life easier every week.
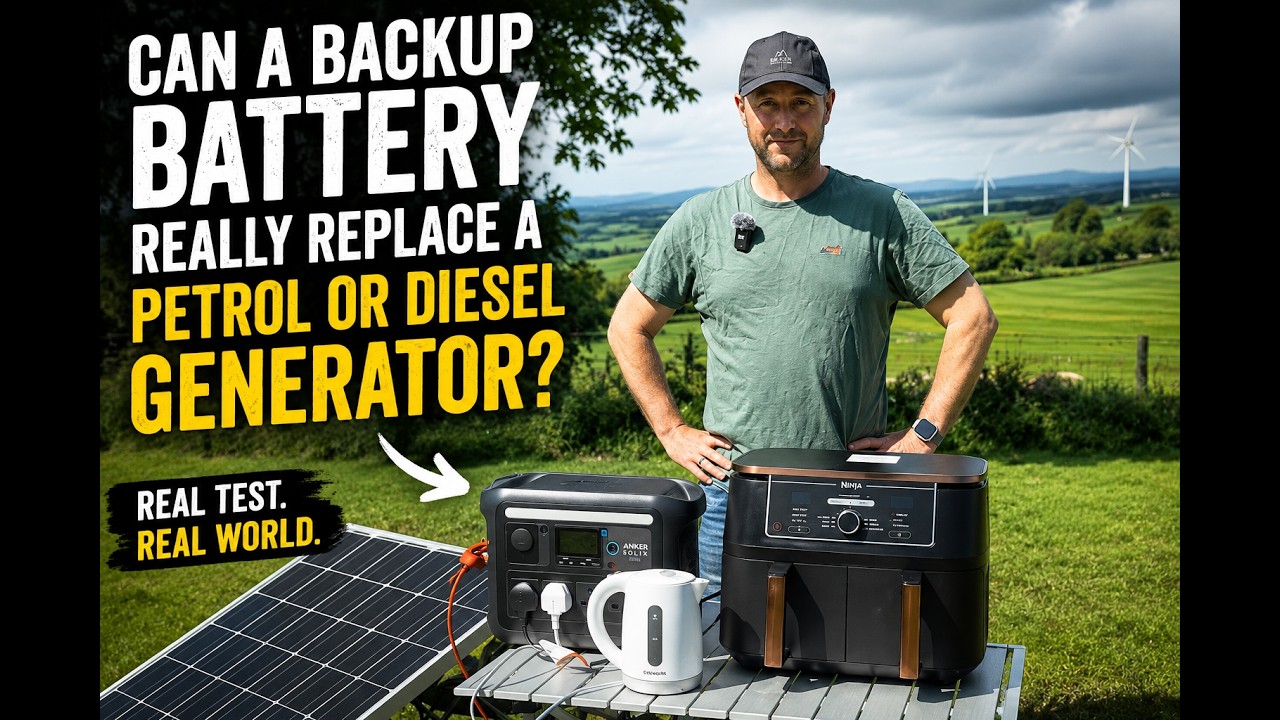
I’ve had my C1000 since May 2025, it has already kept my Starlink and office setup online through 6 power cuts
It’s portable and versatile, you can run power tools offgrid or even use it for car boot cooking
There is a newer version on sale, this one is heavily discounted and still more than capable
Anker are a high quality brand, you can trust this device not to damage your tech and to withstand normal use.
It has excellent solar integration, you can source your own panel and connect it easily
Rapid recharge time from the mains
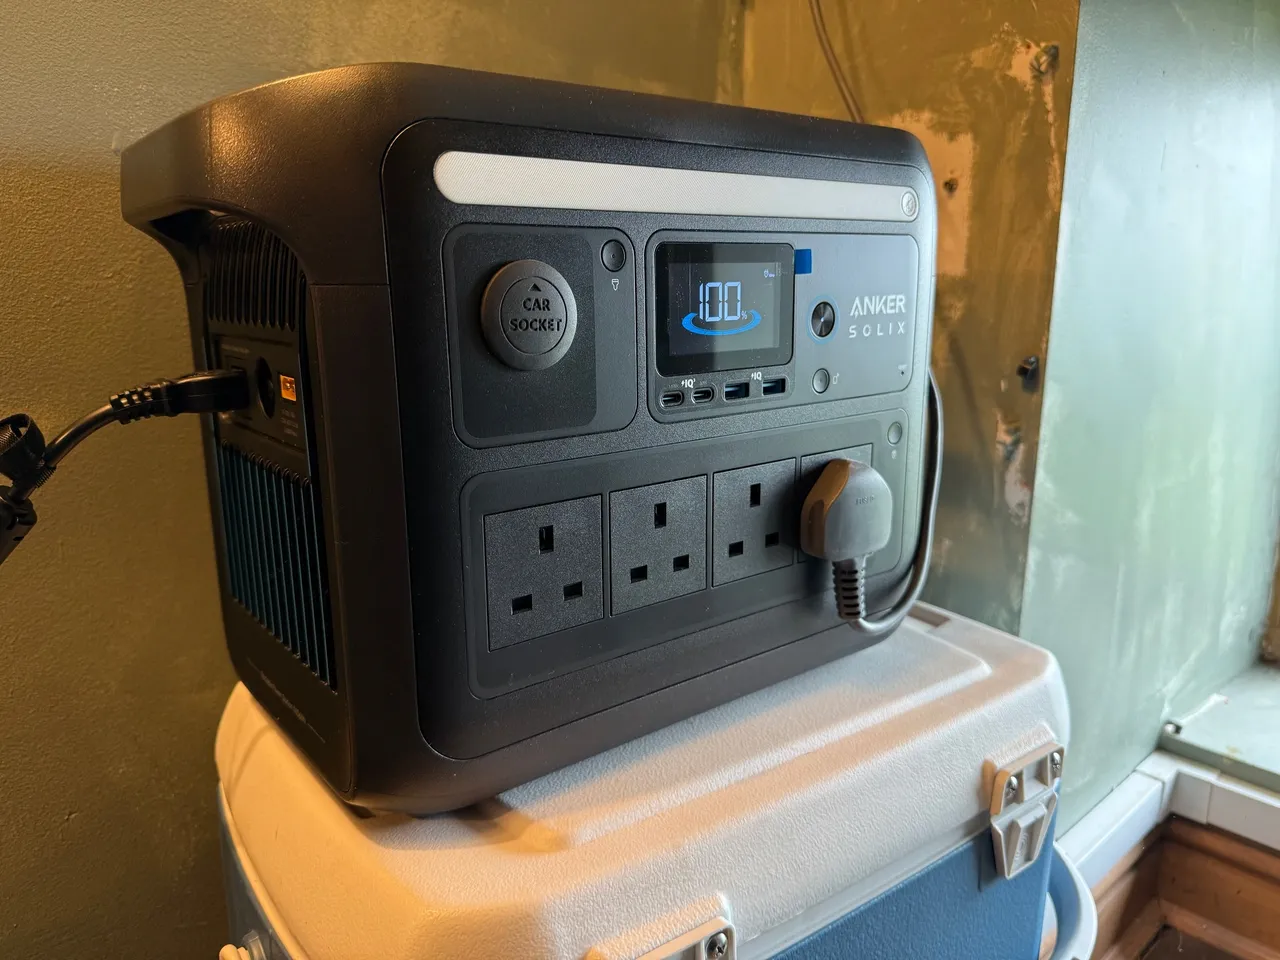
Generous amount of sockets – USB C, USB A, 12v and 240v
It won’t run a normal kettle – it trips out at about 2kw but it will run an air fryer or hot chocolate machine easily
If you are in the market for a backup battery / generator definitely put the C1000 on your shortlist, I am very happy with mine.
Situation – why we needed the C1000 in our lives:
We live in a house sat between four fields on the side of a hill in the Lake District. We are 4.5 miles from the closest shop, a similar distance in the other direction from a pub, and right at the end of the line for power supply. We still do not have fibre broadband.
All of this is great as far as I am concerned – in fact, it’s exactly what we were looking for when we moved here. It does mean we have to be able to take care of ourselves and solve problems on a fairly regular basis.
I am a professional remote worker. I do a few different jobs and they all depend entirely on being able to get online and operate IT equipment. I cannot earn without that infrastructure in place.
It was never really much of a problem until January 2025. Prior to that, we would have the occasional power cut, especially in storms, but by the time I had boiled the kettle on the gas hob, we were up and running again. In January, there was extensive damage to the high-voltage grid in Cumbria, and the recovery teams simply could not get around to all of them. We were off for just under 48 hours. Fortunately, it was at the weekend, so it did not affect work, but we did lose most of our frozen food, and it got us thinking.
I tried hooking an old camping inverter up to the battery of my Volvo with the engine running. It was enough to get the LED displays of the fridge-freezer to come on, but not the compressor.
I looked into getting a generator– petrol or diesel. You don’t really get much for less than £1,000, and then you have to keep it somewhere, replenish the fuel to stop it going off, and run it every month to keep it in good condition. It has to be outdoors when running, and not all of them are weatherproof. It’s another engine to service with oil changes, spark plugs, and so on. And the noise.
I thought about professionally installed house batteries – tempting, as I could benefit from cheap overnight electricity on Octopus. These systems don’t necessarily provide backup power in the event of a cut, and they are certainly not cheap.
Anyway, spring continued and I forgot about it for a while – until the electricity company wrote to me to say the power would be going off for repairs for the whole of a Monday in May. I made plans to work from my wife’s office. It wasn’t a great day – I felt in the way and I didn’t get much done. So I went back to making my own backup plan. A portable power station made so much sense for what I needed.
C1000 Specifications:
The Anker C1000 holds 1056Wh– one kilowatt-hour (kWh), in other words. That’s enough to run a 1kW electric fire for about 50–55 minutes, or a 100W light bulb for around nine hours once you allow for inverter losses. In my case, it’s plenty to run my Starlink setup, laptop, and external screens for seven or eight hours. If I wasn’t running my full complement of office equipment, it would run Starlink for a good 15–18 hours.Alternatively, you could use it to cycle the fridge-freezer every few hours and to run room lighting. If you’re wise with it, that 1kWh can go a long way and make the difference between surviving and being relatively comfortable.
The C1000 can deliver 1800W continuouslyand up to 2400Wfor a short surge. It can recharge to full in as little as 58 minutes, and the battery technology is good for 3,000 cycles to 80% capacity – roughly ten years of normal use. It has 9 output ports, including two USB-C, two USB-A, four 240V mains sockets, and a 12V car “cigarette lighter” style port. You can charge it from solar panels if you have them, and it will also accept input from a car 12V system. It comes with a car charging lead, some solar adapters, and a 240V mains lead.
I talked myself into the idea pretty easily in the end – no fuel to worry about, no noise, no maintenance. I also liked the thought of taking it on camping trips – not something you could sensibly do with a generator.
My Review:
I have had mine for a year now, so I feel qualified to give it a considered review.
I have used it “in anger” for six power cuts, one of which lasted 7 hours, it was more than capable of running my work setup. Several of the cuts we’ve had so far were short but featured the power coming off and on again a few times before stabilising – very annoying if your router has to power cycle each time before reconnecting. I found the C1000’s uninterruptible power supply mode very useful here. You plug the C1000 into the mains, turn it on, then plug your router and computer into it, and it prevents any issues when the mains supply flickers.
I keep the C1000 near our router with a long extension cable next to it. When the power goes off, I plug the router straight in. By the time I’ve run the extension to my computer, the Wi-Fi is back on and I can carry on with my day, only losing a couple of minutes.
I’ve found quite a few other great uses for it:
DIY – When doing electrical work with the power off, I can still run my drills, multitools, and lamps from the C1000. Ideal for chasing in new sockets and fault-finding.
Outdoor DIY – We own a little bit of land, and quite often I need to run a power tool out of range of the house. The C1000 has been more than happy to run drills, cutting tools, and a table saw out and about.
Leisure – I’ve run a Hotel Chocolat Velvetiser in the boot of my Volvo and provided hot chocolate to friends. You could easily run an air fryer from it too (though not a normal kettle – they’re 3kW).
Vehicle / machinery – the 12v “car cigarette lighter” output runs my tyre compressor, very handy if I’ve got more than one tyre to inflate or if I’m pumping up the tyres on my lawn tractor which does not have an outlet. The compressor draws about 120w and soon takes the edge of the vehicle battery whereas the C1000 drives it hard for as long as you need.
I’ve also been experimenting with solar power. I found an old 190W solar panel and was able to get a connector from Amazon for about £15. I was surprised how well it worked – the telematics on the C1000 showed it delivering up to 157W in direct sunlight. A larger 400W panel could recharge the C1000 in around three to five hours of good light. Even my small panel is enough to provide more than I use with my Starlink system and computer. If I was away camping, I think leaving that set-up would keep us in business for mobile phone and iPad charging for a week easily.
In normal use, I have it plugged into a smart socket in our wardrobe. I’ve set a reminder on my calendar to charge it up every three months or so, to make sure it’s ready to go when needed. It also means I can flick it on if it seems likely there’ll be a power cut.
The C1000 has a few other features that I appreciate. There’s a good smartphone app that lets you update the firmware, remotely turn it on, or read its telematics. This is very useful when it’s running, as you can keep an eye on remaining battery power and even the performance of your solar if you have it. I also like that you can set the mains charging speed – I’ve turned mine down to 400W to be gentler on the battery and reduce fan noise. If I was in a hurry, I could turn it up to ultra-fast. I never thought I’d use the built-in LED strip light, but I must admit, it’s been really useful a few times.
The unit itself is very well designed. It’s heavy, but it has two solid carrying handles at the top. It feels premium, built to last. I note that you can buy an extension battery to double the capacity if needed.
All considered, I am extremely pleased with my C1000 and I highly recommend it.
My own device is the first generation C1000, it is no longer on sale so my Amazon UK links will take you to the new model which looks even more impressive.
Used to determine whether a user is included in an A / B or Multivariate test.
18 months
_ga
ID used to identify users
2 years
_gali
Used by Google Analytics to determine which links on a page are being clicked
30 seconds
_ga_
ID used to identify users
2 years
_gid
ID used to identify users for 24 hours after last activity
24 hours
_gat
Used to monitor number of Google Analytics server requests when using Google Tag Manager
1 minute
_gac_
Contains information related to marketing campaigns of the user. These are shared with Google AdWords / Google Ads when the Google Ads and Google Analytics accounts are linked together.
90 days
__utma
ID used to identify users and sessions
2 years after last activity
__utmt
Used to monitor number of Google Analytics server requests
10 minutes
__utmb
Used to distinguish new sessions and visits. This cookie is set when the GA.js javascript library is loaded and there is no existing __utmb cookie. The cookie is updated every time data is sent to the Google Analytics server.
30 minutes after last activity
__utmc
Used only with old Urchin versions of Google Analytics and not with GA.js. Was used to distinguish between new sessions and visits at the end of a session.
End of session (browser)
__utmz
Contains information about the traffic source or campaign that directed user to the website. The cookie is set when the GA.js javascript is loaded and updated when data is sent to the Google Anaytics server
6 months after last activity
__utmv
Contains custom information set by the web developer via the _setCustomVar method in Google Analytics. This cookie is updated every time new data is sent to the Google Analytics server.
2 years after last activity
Jetpack's built-in visitor analytics. It records page views, referring sites, search terms, and outbound link clicks, and also carries the shared visitor-tracking library used by Jetpack Instant Search and WooCommerce Analytics.